Hellbound: Road to Dynasty & Icarus
Everything you need to know to gear up your character through Hellbound on Project Ortos — from your first Standard Certificate to a full Dynasty set, then through Stage 12 unlock, Icarus weapons, and finally the Beleth raid.
01What you need to know first
Hellbound on Project Ortos works a bit differently from retail Lineage 2. Read this section before you set foot on the cursed island — it will save you hours of confusion.
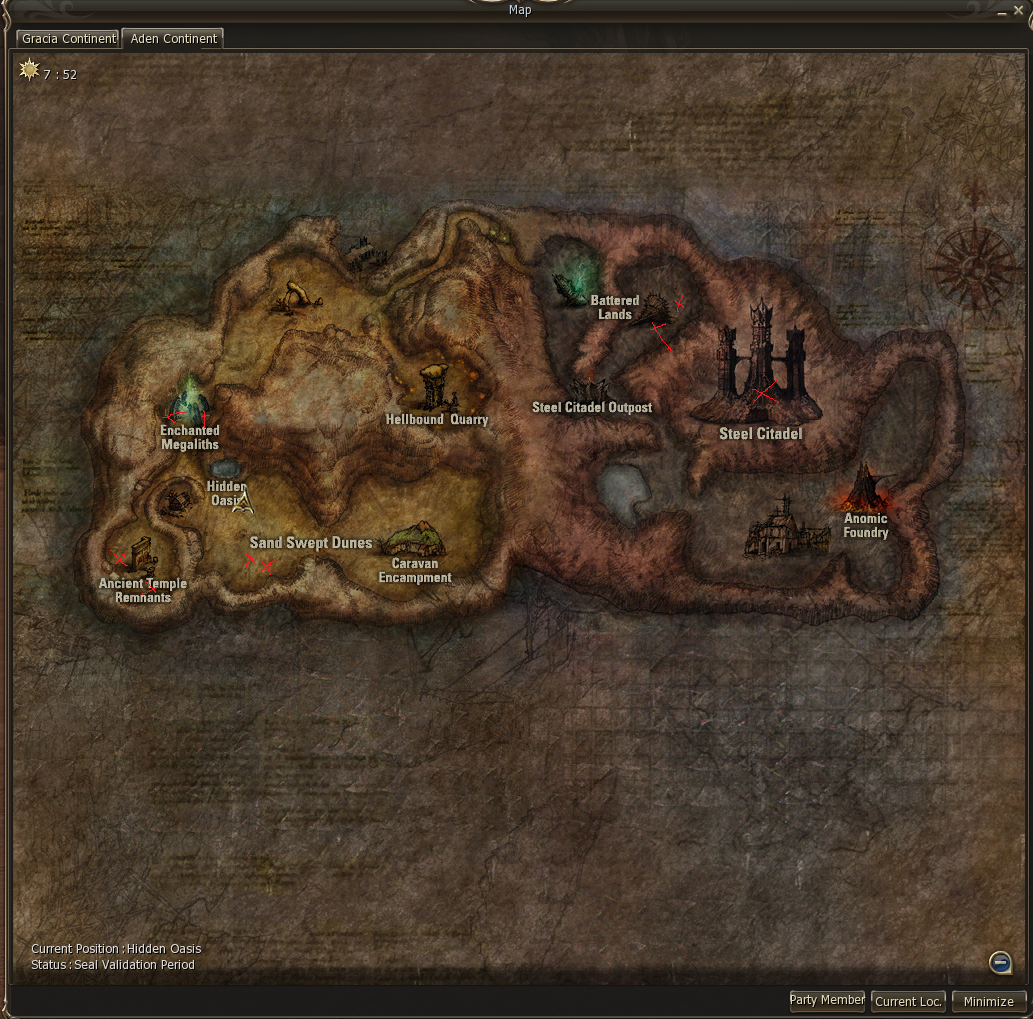
Hellbound territory starts at island level 11 on our server (no need to grind from 0) and is the endgame focus of Stage 2 and Stage 3 of the server timeline. Stage 12 (the new tier) is unlocked by the community over time — see Section 06.
Quick glossary
- Hellbound level — the global progression of the island (1 → 12). Affects which content is unlocked. Check it any time with the voiced command
.hellbound. - Standard Certificate — the entry token you need to start farming Dynasty.
- Premium Certificate — a higher-tier token that you trade for actual Dynasty pieces.
- Sealed Dynasty Piece — the raw material; you craft it into wearable Dynasty using the right recipe and key materials.
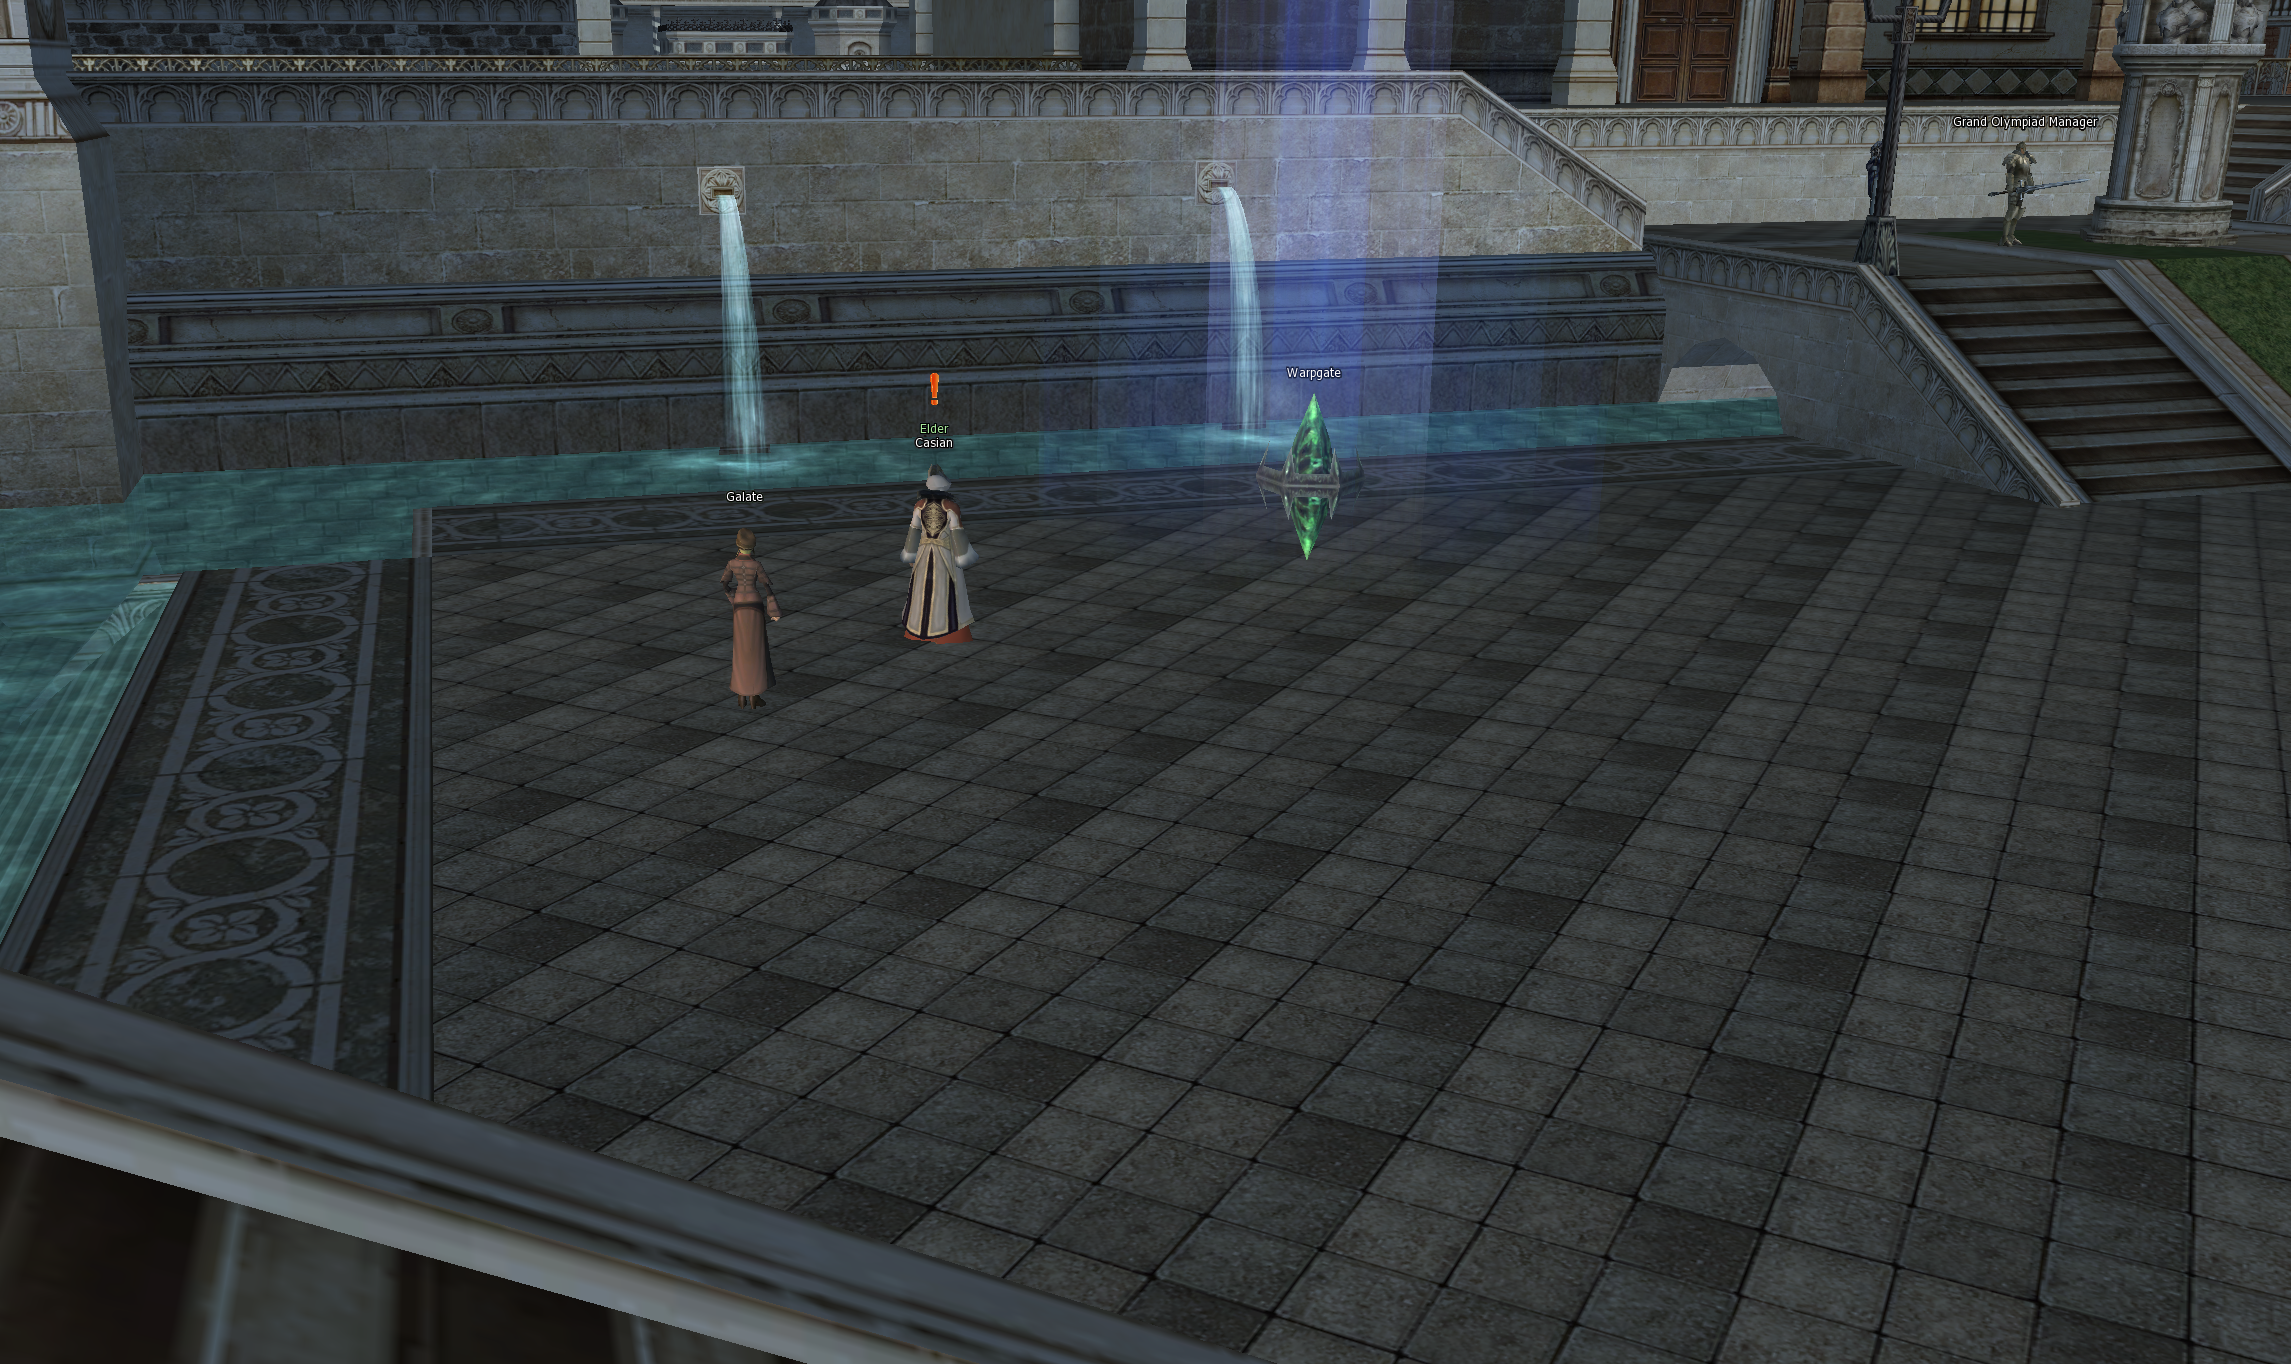
02Getting to Hellbound
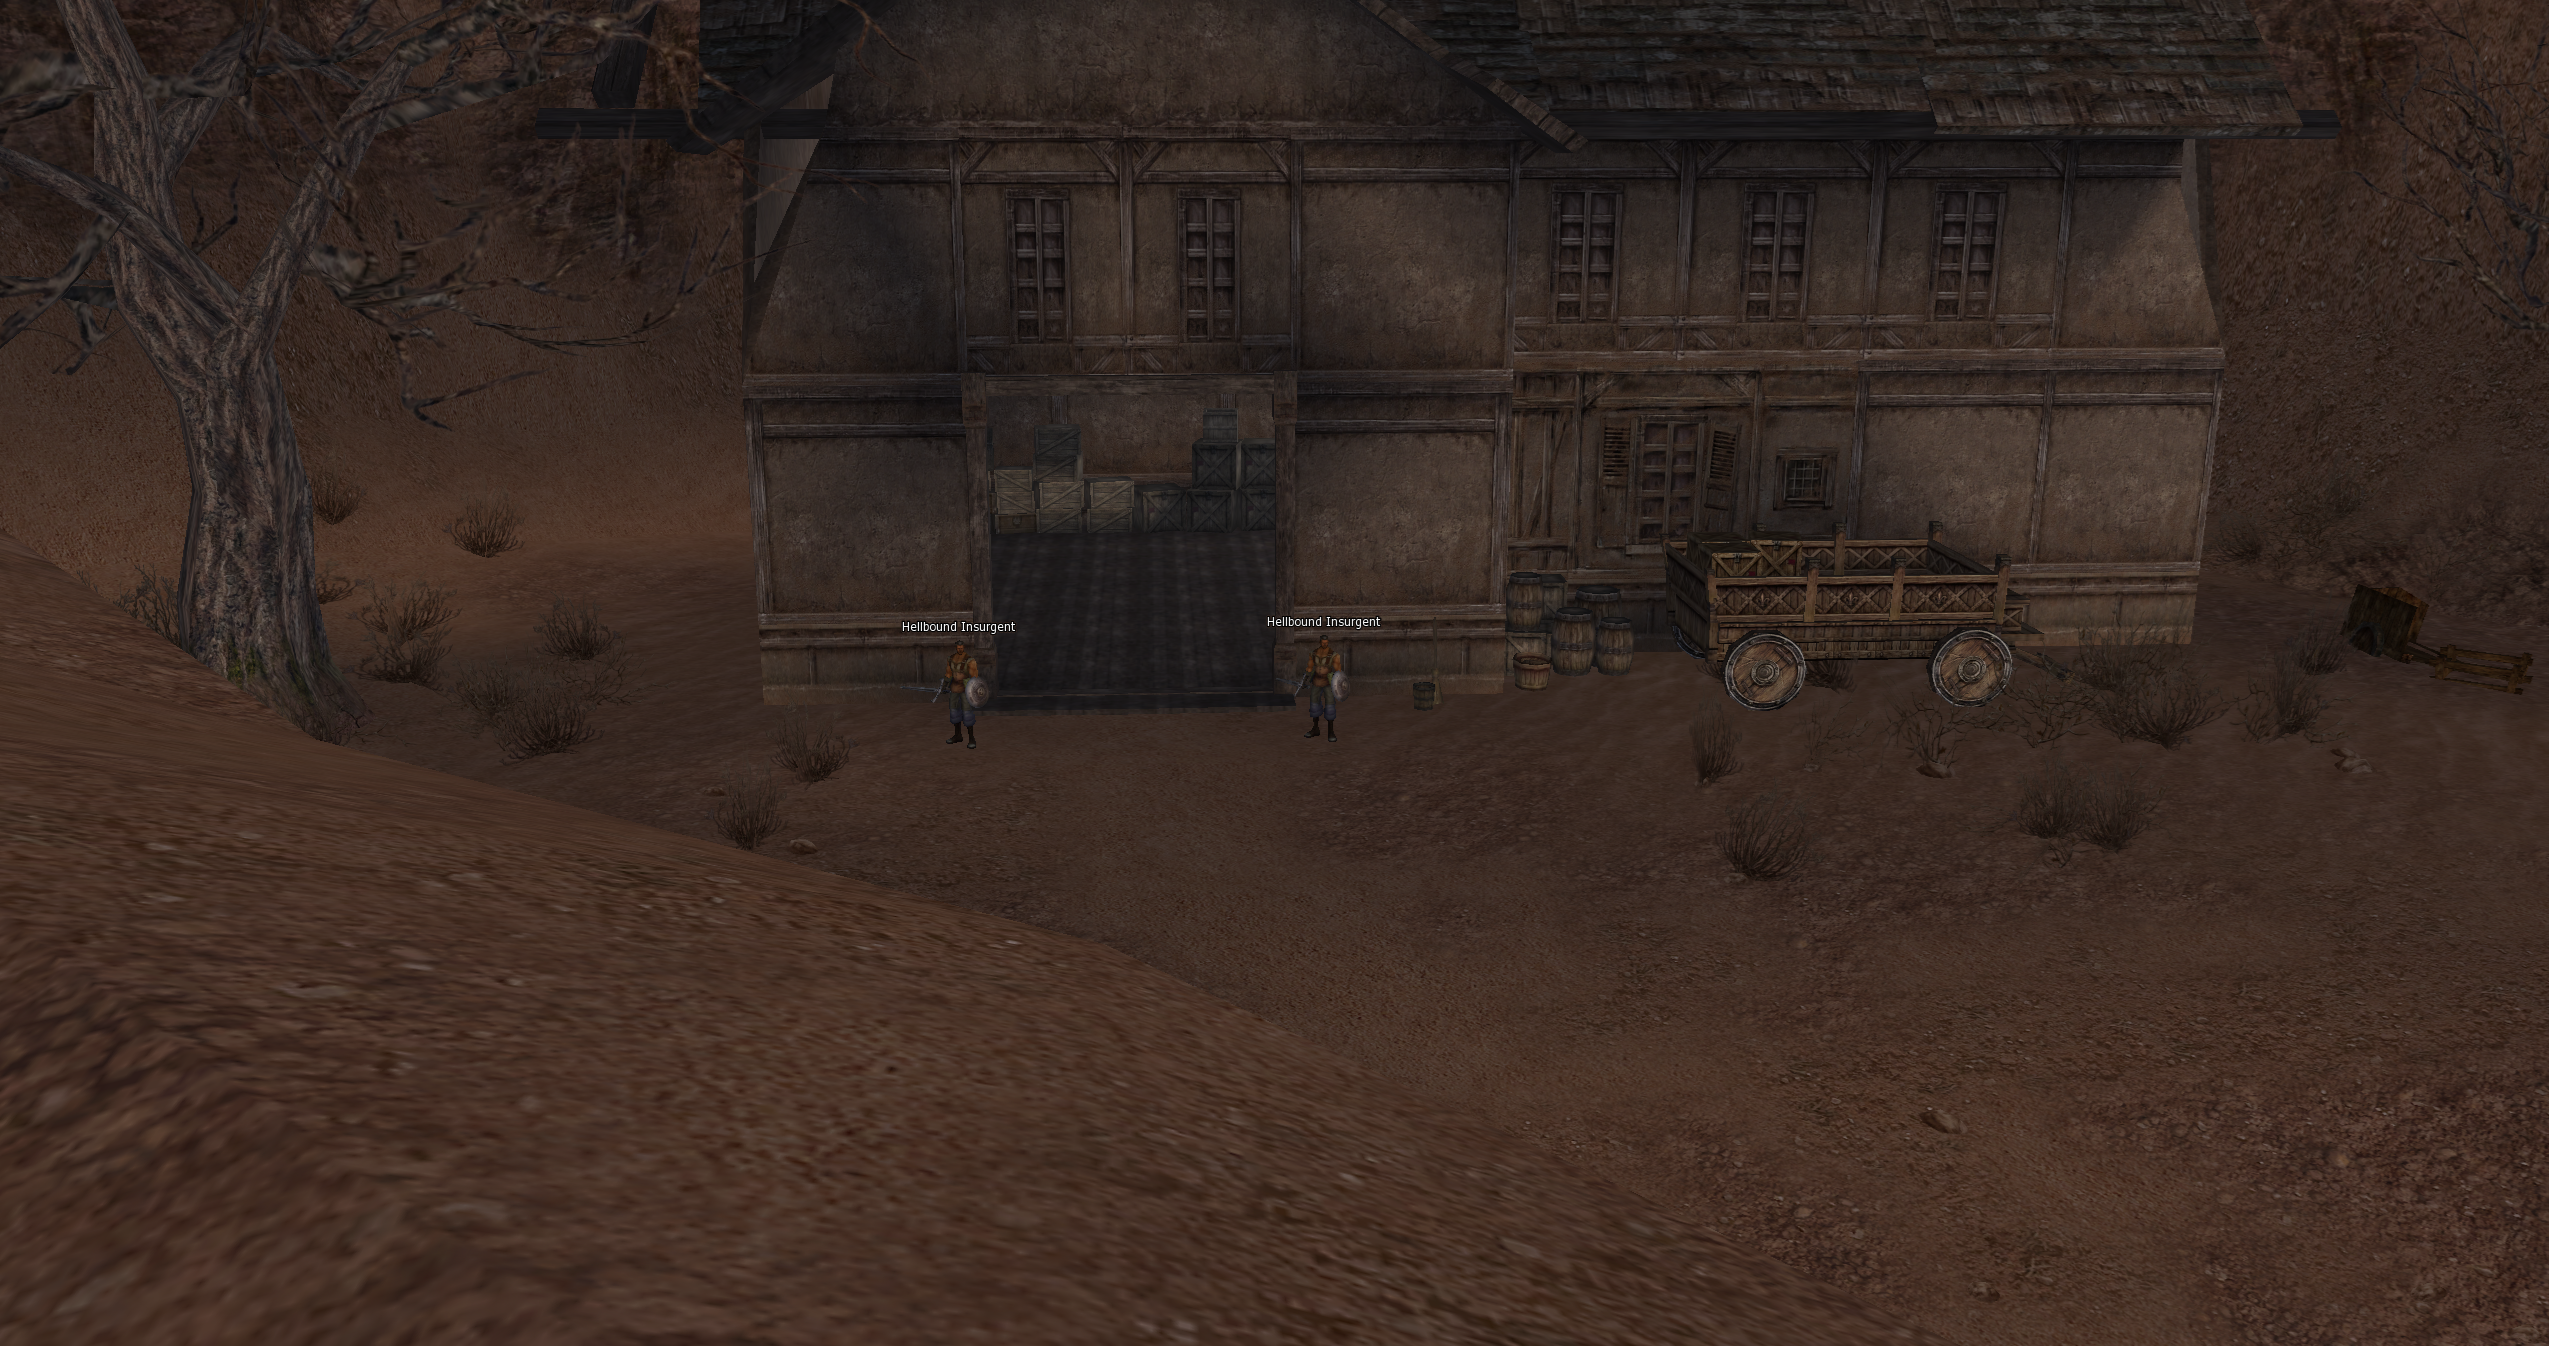
Hellbound is gated behind Quest — Path to Hellbound. You must complete it once per character; afterwards the Warpgate will let you in freely.
On retail this quest sends you running. On Project Ortos, both quest NPCs and the Warpgate stand right next to each other in Heine — the whole quest is finished within a few meters.
Where to go
Teleport to Heine from any gatekeeper. Look for this trio standing together near the town's central plaza:
| NPC | Role |
|---|---|
| Casian | Quest start (Path to Hellbound) |
| Galate | Quest second NPC |
| Warpgate | Teleport into Hellbound (after quest) |
Requirements
- Character level 78+
- Hellbound island must be unlocked (it is on Project Ortos — Stage 2 and 3)
Quest steps (short version)
- Talk to Casian → accept the quest.
- Talk to Galate next to him.
- Return to Casian → receive Casian's Blue Crystal.
- Bring the crystal to Galate → quest complete.
- Use the Warpgate to teleport into Hellbound.
After the first time you do not need to redo the quest. Just come back to the same spot in Heine and use the Warpgate — it ports you straight to the island.
Useful in-game command
| Command | What it does |
|---|---|
.hellbound | Shows current Hellbound level + trust + (at level 11) Stage 12 unlock progress. |
03The Caravan Certificate path
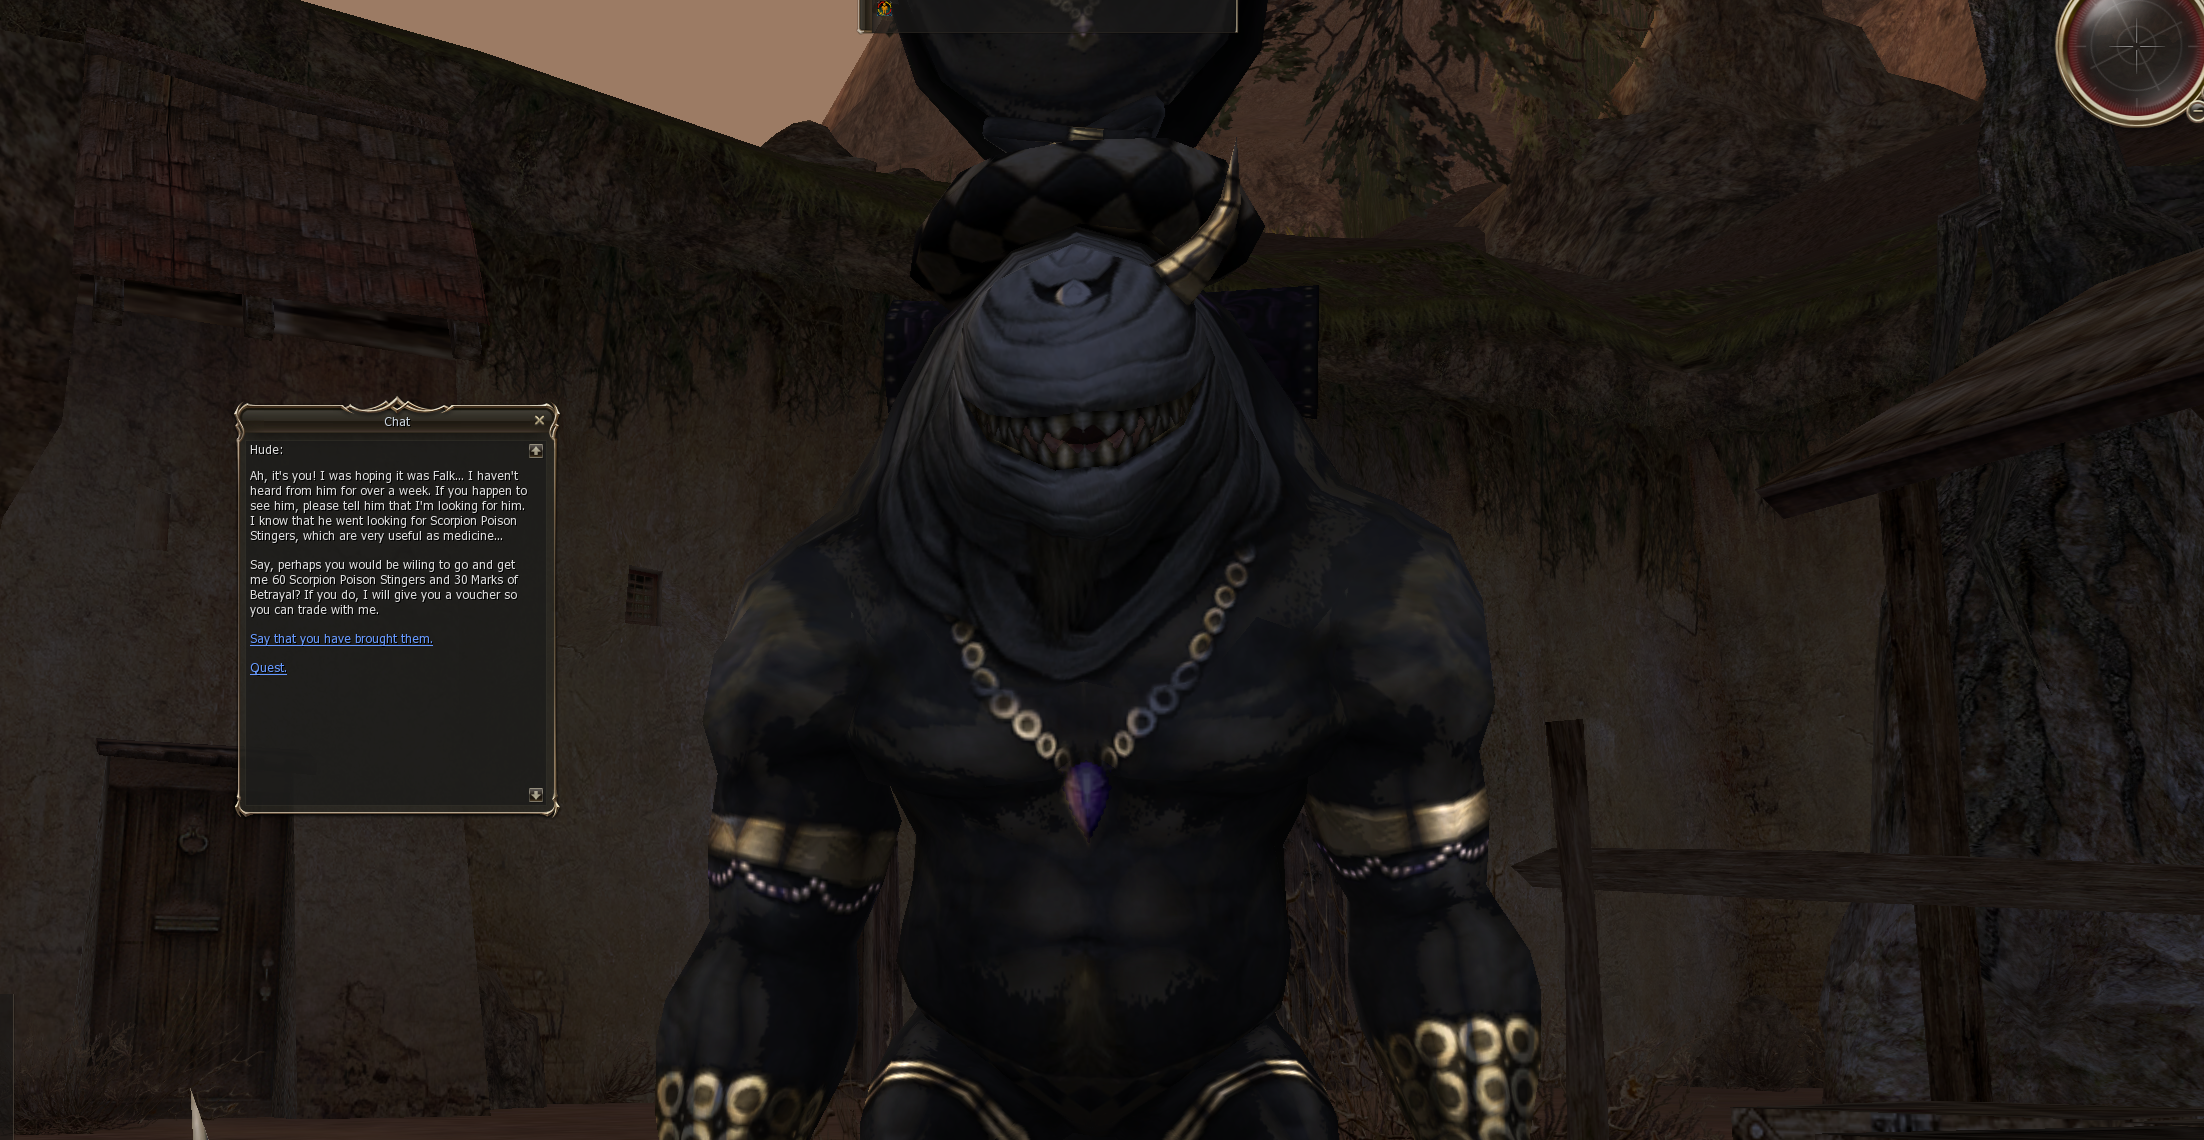
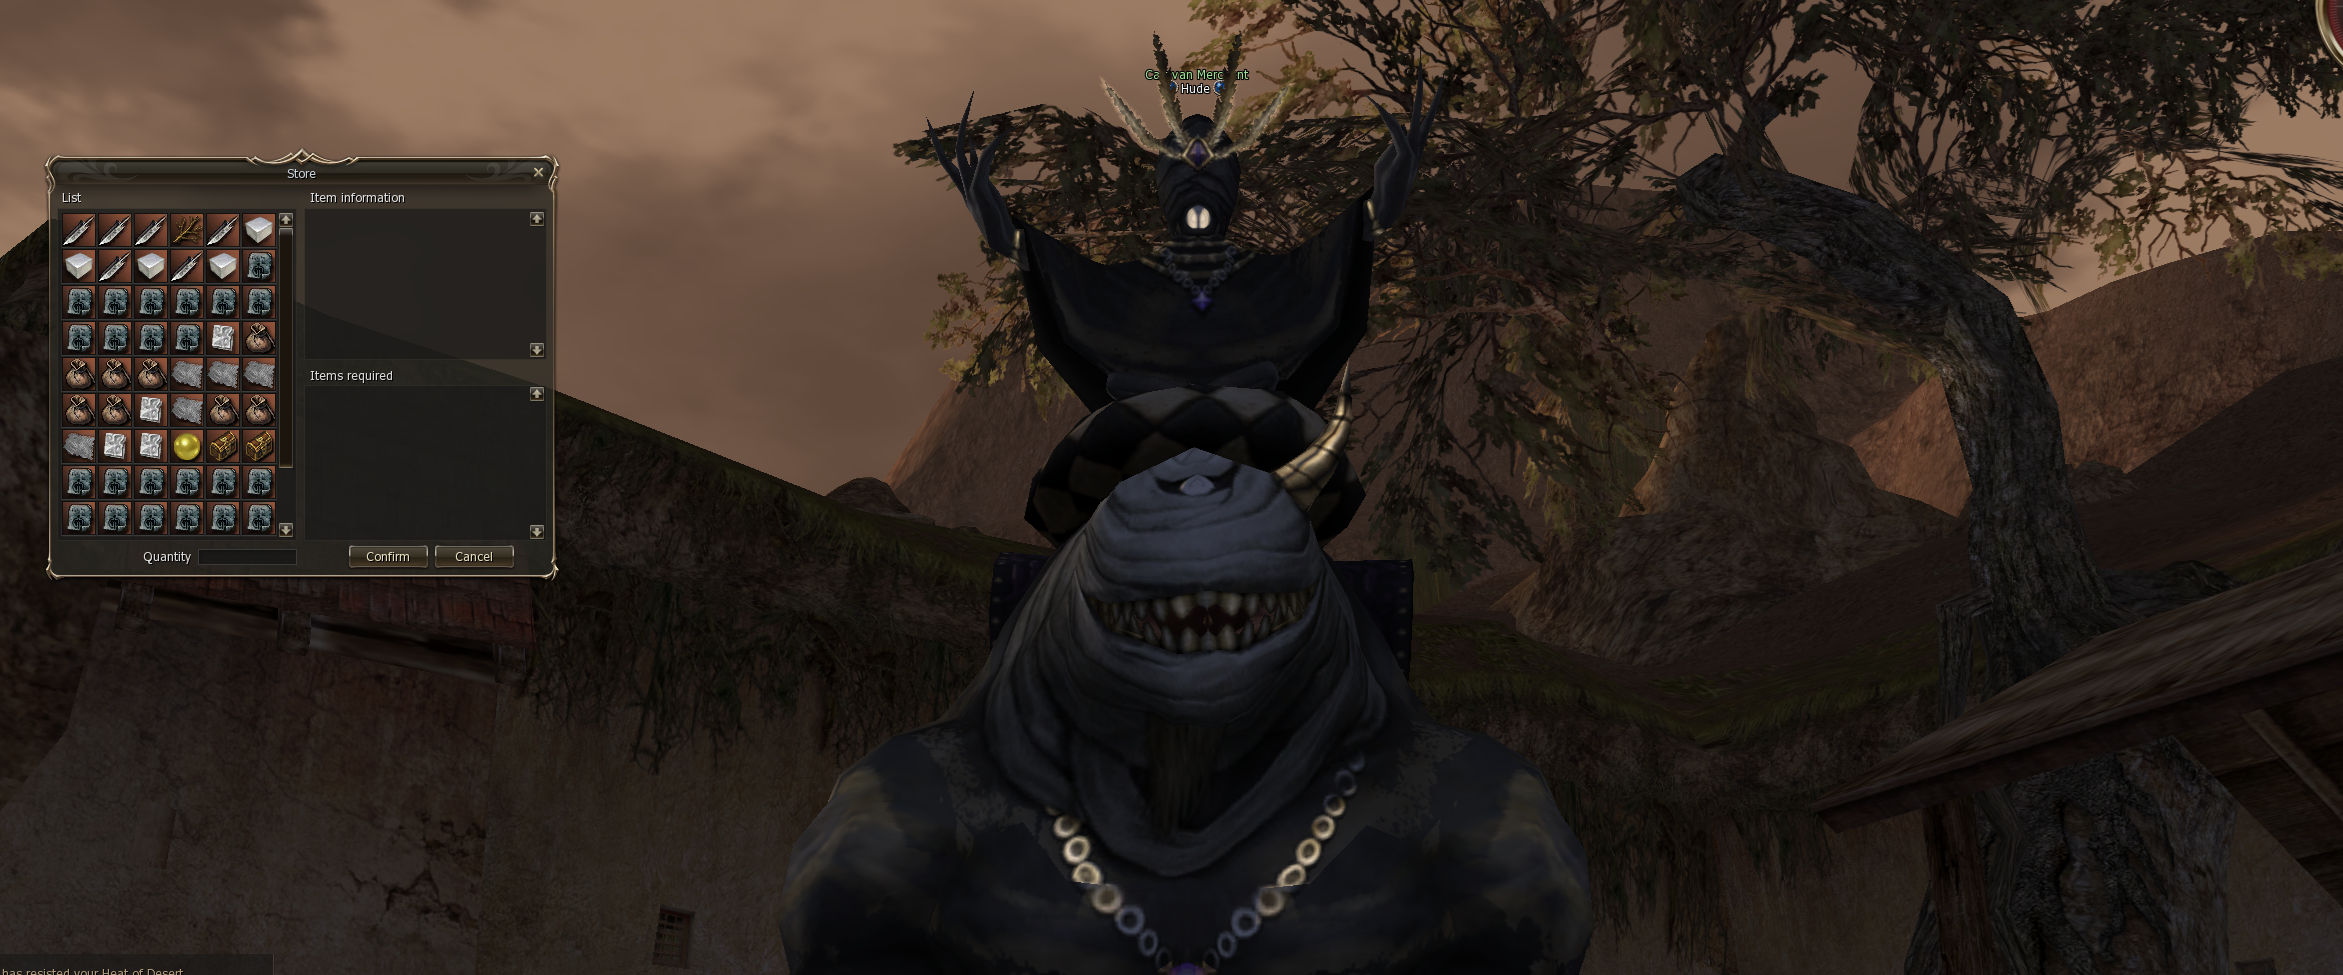
Sealed Dynasty Parts on Project Ortos are sold by Hude in a multi-sell that opens only after you hold a Premium Caravan Certificate. The Premium Cert itself is the end of a 3-step certificate chain.
  1. Falk    : 20 Darion's Badge                                       →  Basic Cert
  2. Hude    : Basic   + 30 Mark of Betrayal + 60 Scorpion Stinger     →  Standard Cert
  3. Hude    : Standard + 30 Life Force + 8 Contained Life Force       →  Premium Cert + Map
  4. Hude    : (with Premium Cert in inventory) opens Sealed Dynasty multi-sell
                Pay Hidden Pages + Demon Contract Fragments            →  Sealed Dynasty Pieces
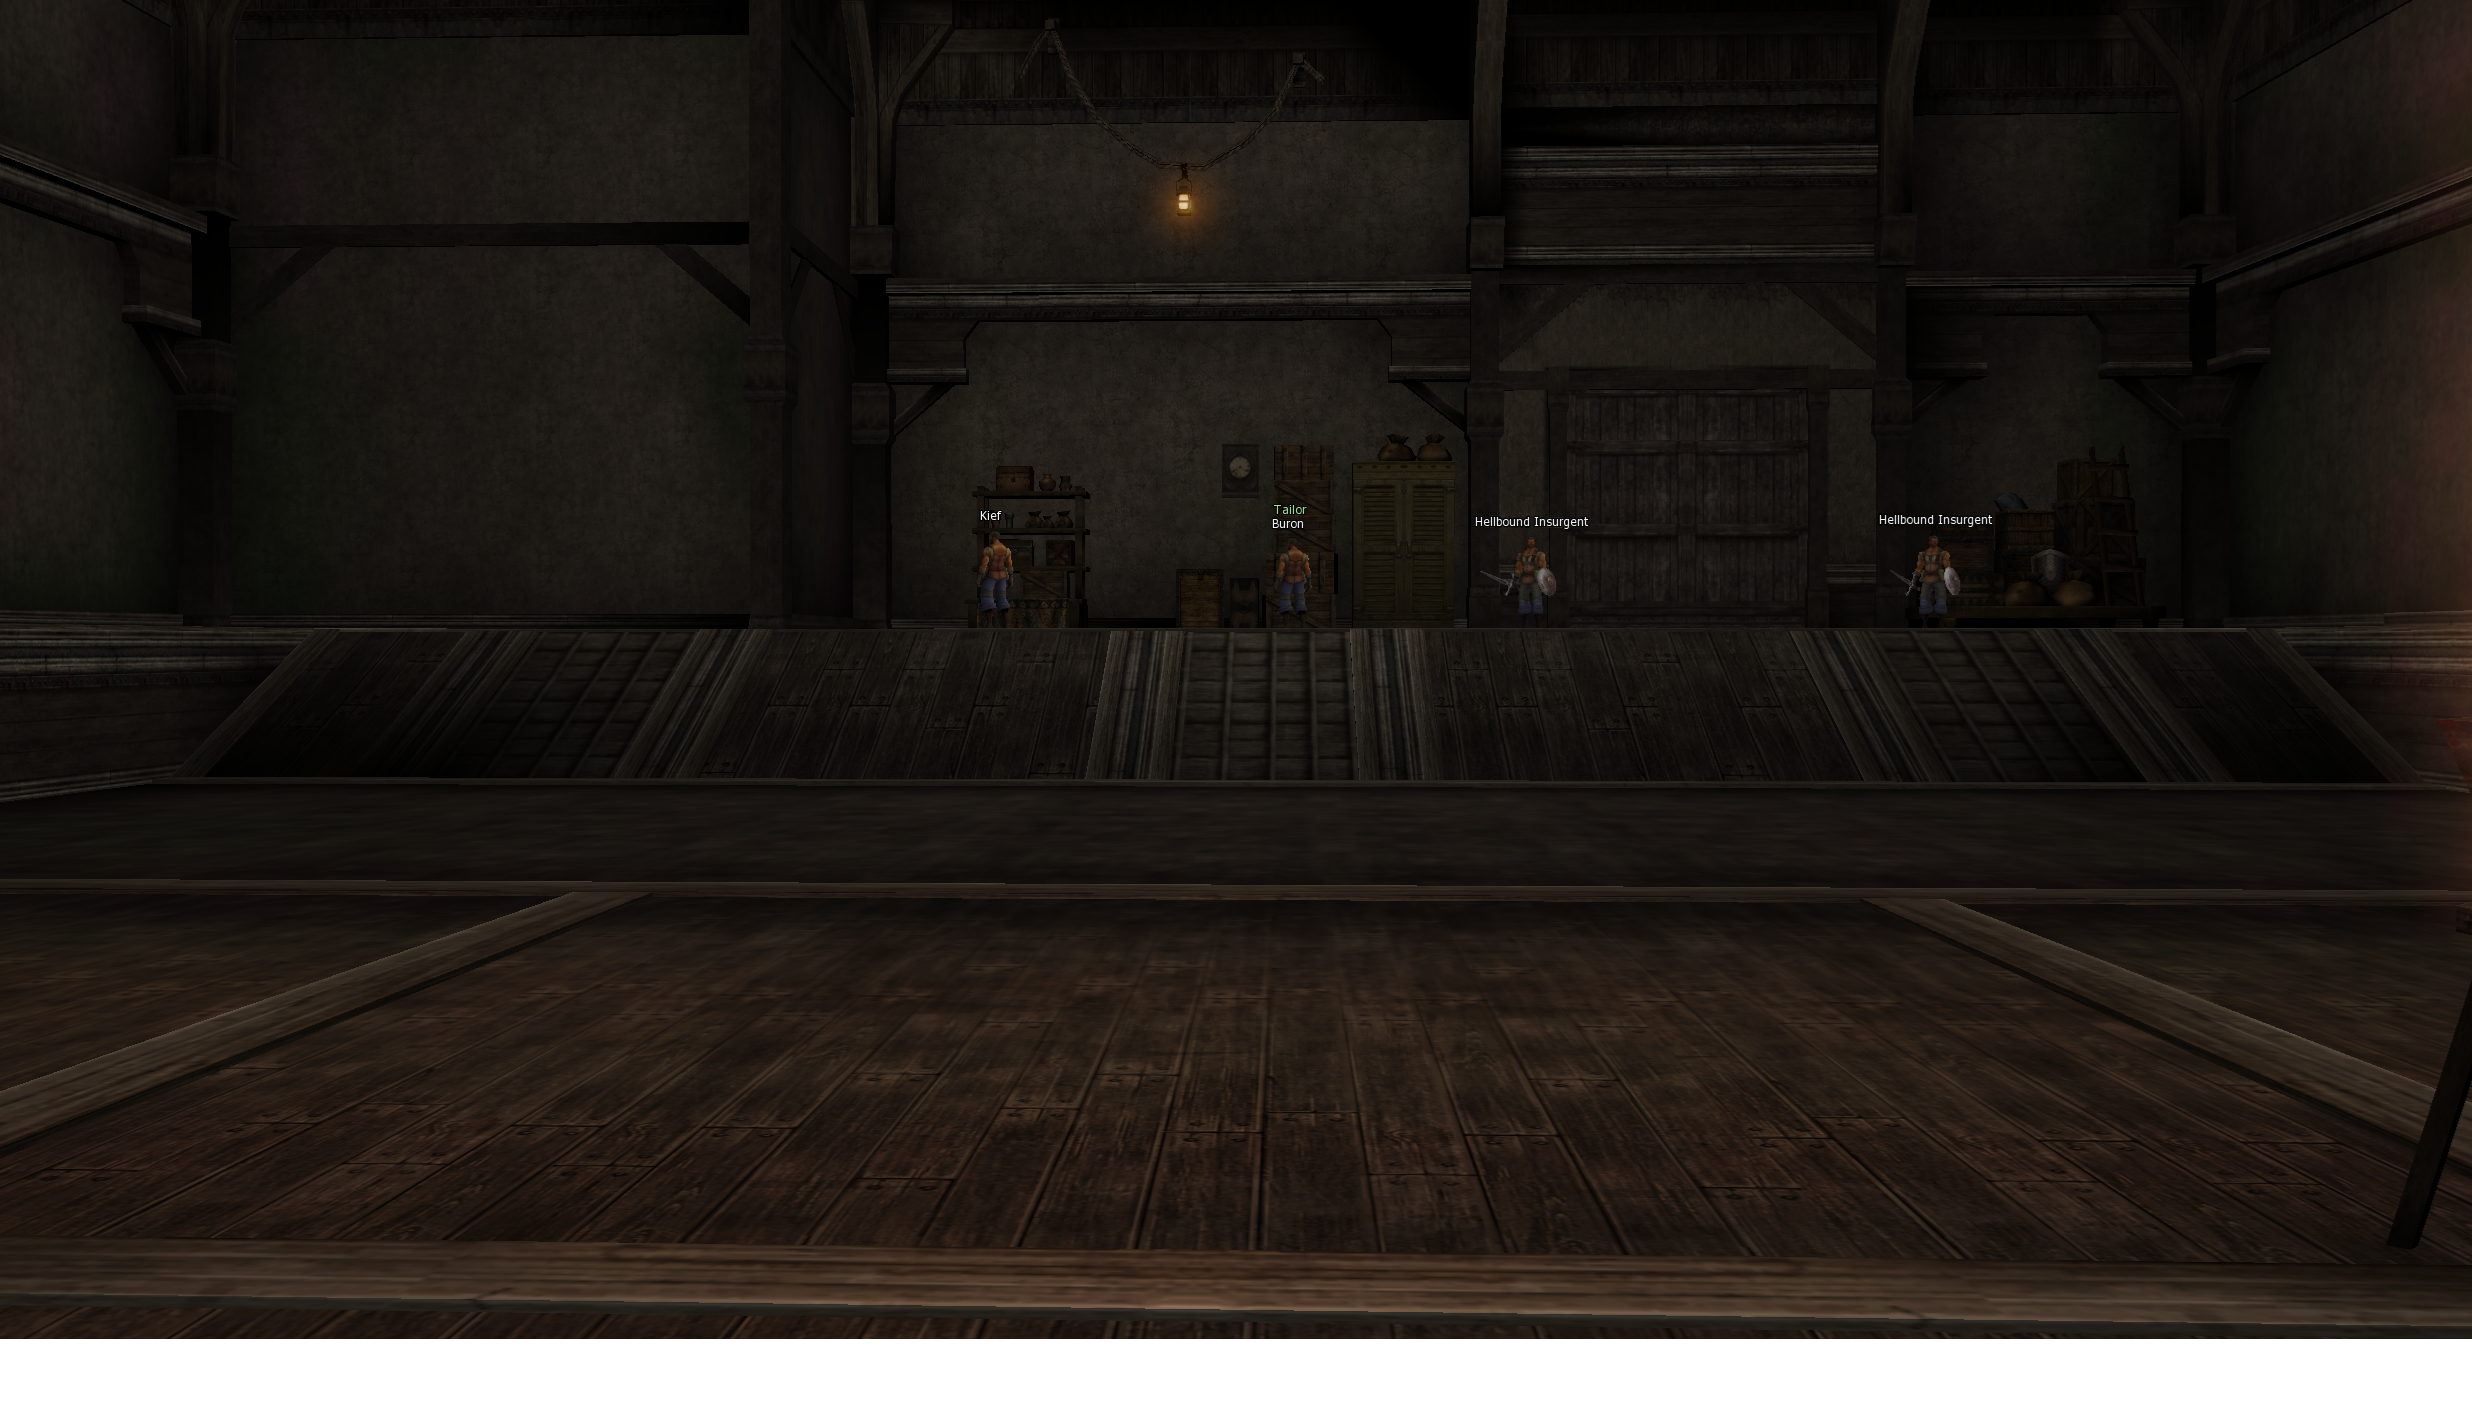
Where the certificate NPCs stand
| NPC | Role |
|---|---|
| Falk | Basic Caravan Certificate |
| Hude | Standard + Premium + Sealed Dynasty multi-sell |
| Kief | Sells Magic Bottles (mandatory for the Premium step) |
Life Force, Contained Life Force and Dim Life Force do NOT drop from a normal kill. You only get them by finishing the target with a Magic Bottle: when the bottle's skill connects the loot spawns on the ground in front of the corpse (only the caster can pick it up). No bottles = no Life Forces = no Premium Certificate.
Magic Bottle — where and how
- Where: Kief in the Native base in Hellbound (event
Bottlein his dialog). - Price: 20 Scorpion Poison Stinger → 1 Magic Bottle — one-time purchase, see below.
- Re-usable: the bottle is not consumed by the skill — buy one and you keep it forever. Bound to the player (no trade / drop / sell), ~1.5 s reuse between catches.
- How it works: the bottle's skill (range ~40 — basically melee distance) only registers on a Chimera or Celtus while its HP is BELOW 10%. Beat the mob down first, then trigger the bottle as the finishing blow — using it on a full-HP target does nothing and just wastes the cooldown.
- Loot delivery: on a successful catch the Force item drops on the ground, reserved for the caster — pick it up like any normal drop. Nothing lands directly in your inventory.
The bottle works on both, but they drop completely different items:
- Chimera (Earth / Darkness / Wind / Fire) — rolls 80% Dim Life Force / 16% Life Force / 4% nothing per successful catch. Most catches give the worthless Dim variant; Life Force itself is the 1-in-6 outcome.
- Celtus — drops exactly 1 Contained Life Force per successful catch.
That makes Celtus the only source of Contained Life Force on the island — and you need 8 of them per Premium Cert.
Stingers are needed in two places: 60 per Standard Certificate (Hude), and a one-time 20 for the Magic Bottle (Kief). Once you own the bottle it is re-usable forever, so practically your only ongoing Stinger cost is the 60 per Standard Cert.

04Farming the certificate inputs
Each step of the certificate chain consumes specific items. Here is exactly what you need and where it drops.
Step 1 — Basic Caravan Certificate
Falk — bring 20 Darion's Badge → receive 1 Basic Caravan Certificate.
Darion's Badges are a baseline drop from regular Hellbound mobs around the central island. You will pick them up naturally while levelling.
Step 2 — Standard Caravan Certificate
Hude — give him 1 Basic Cert + 30 Mark of Betrayal + 60 Scorpion Stinger → receive 1 Standard Caravan Certificate.
| Item | Source | Drop on Project Ortos |
|---|---|---|
| Mark of Betrayal | Wandering Caravan | Own dedicated group, 5% chance |
| Scorpion Poison Stinger | Sand Scorpion | 100% / 1 per kill |
| Scorpion Poison Stinger | Desert Scorpion | 10% / 4–12 per kill |
Step 3 — Premium Caravan Certificate
Hude — give him 1 Standard Cert + 30 Life Force + 8 Contained Life Force → receive 1 Premium Caravan Certificate + 1 Map of Hellbound.
Hude's in-game dialog already displays the updated numbers, so what you read on the NPC matches what he actually charges. Roughly ~46% cheaper Life Force / ~43% cheaper Contained Life Force per Premium Cert than retail.
| Item | Retail cost | Project Ortos cost |
|---|---|---|
| Life Force | 56 | 30 |
| Contained Life Force | 14 | 8 |
| Standard Certificate | 1 | 1 |
Where to farm Life Forces
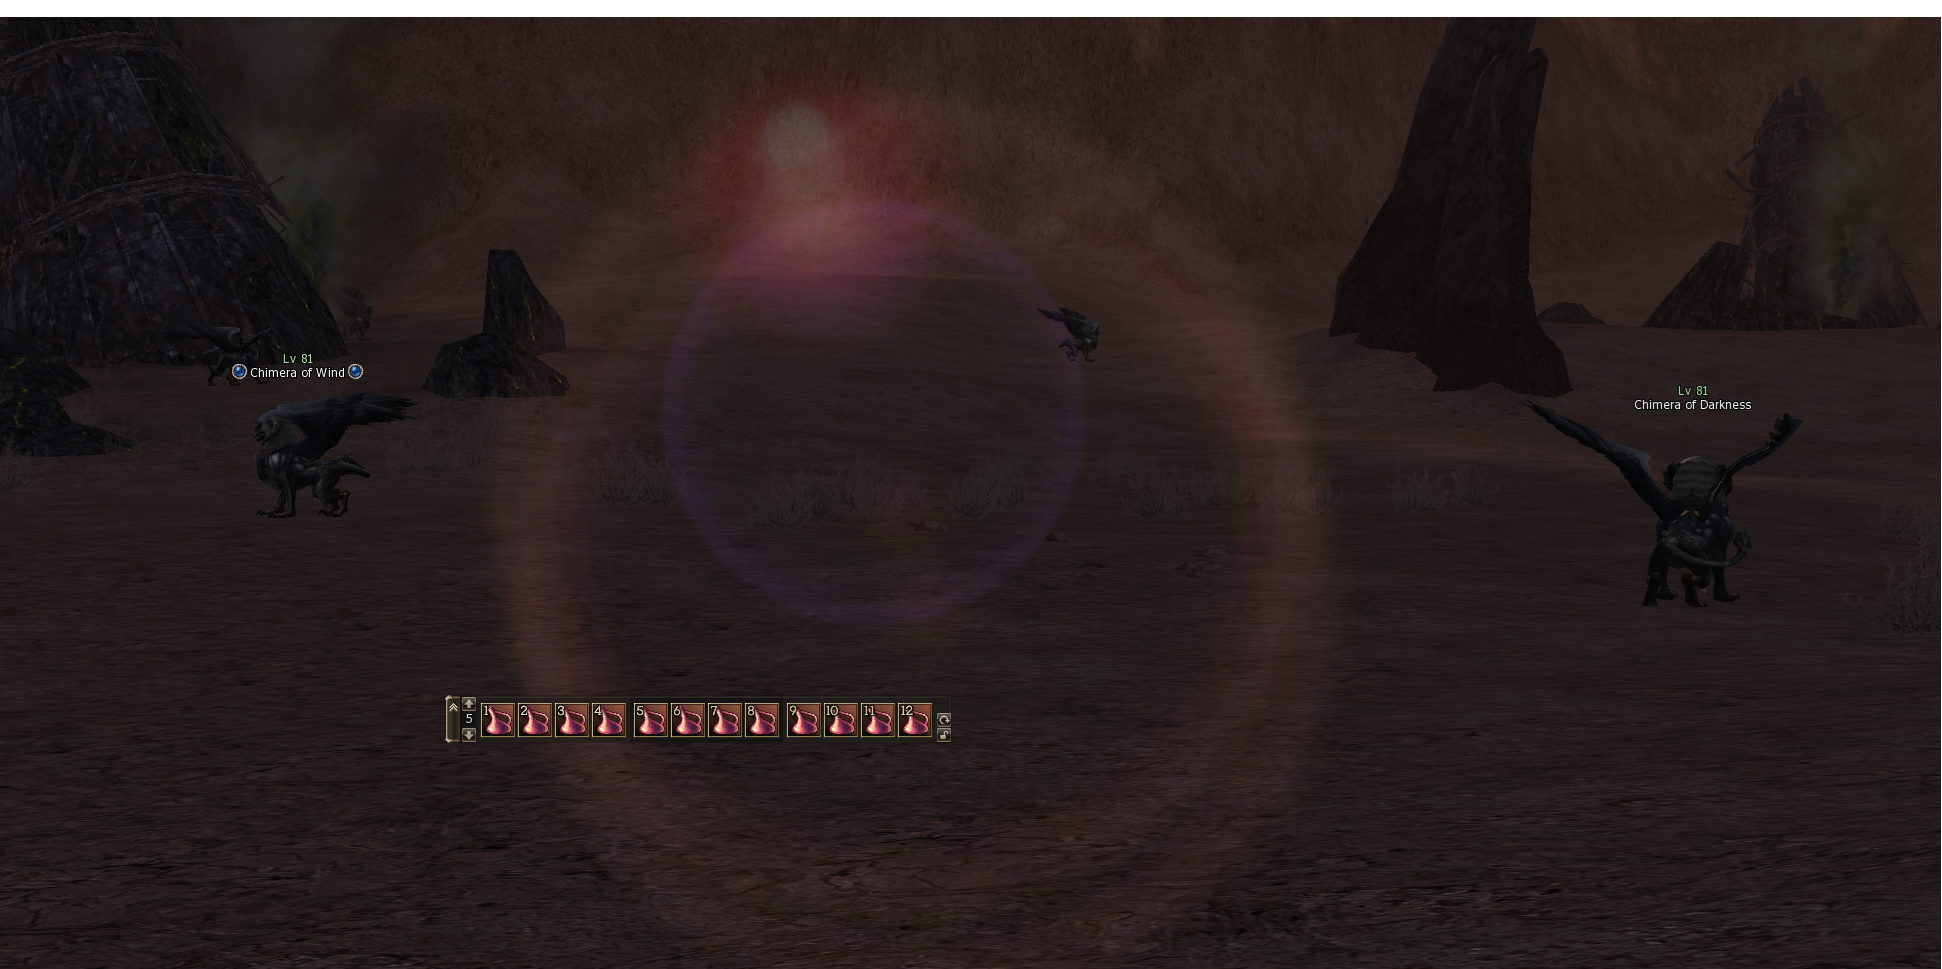
Go to the Battered Lands (south-east region of Hellbound) with a Magic Bottle in your hotbar (see Section 03 — one-time purchase from Kief for 20 Stingers, re-usable forever). Beat the target down to under 10% HP first, then bottle as the finishing blow — the Force item drops on the ground, reserved for you.
| NPC | Bottle drop (per successful catch) |
|---|---|
| Chimera of Earth | 80% Dim Life Force ×1 16% Life Force ×1 4% nothing |
| Chimera of Darkness | |
| Chimera of Wind | |
| Chimera of Fire | |
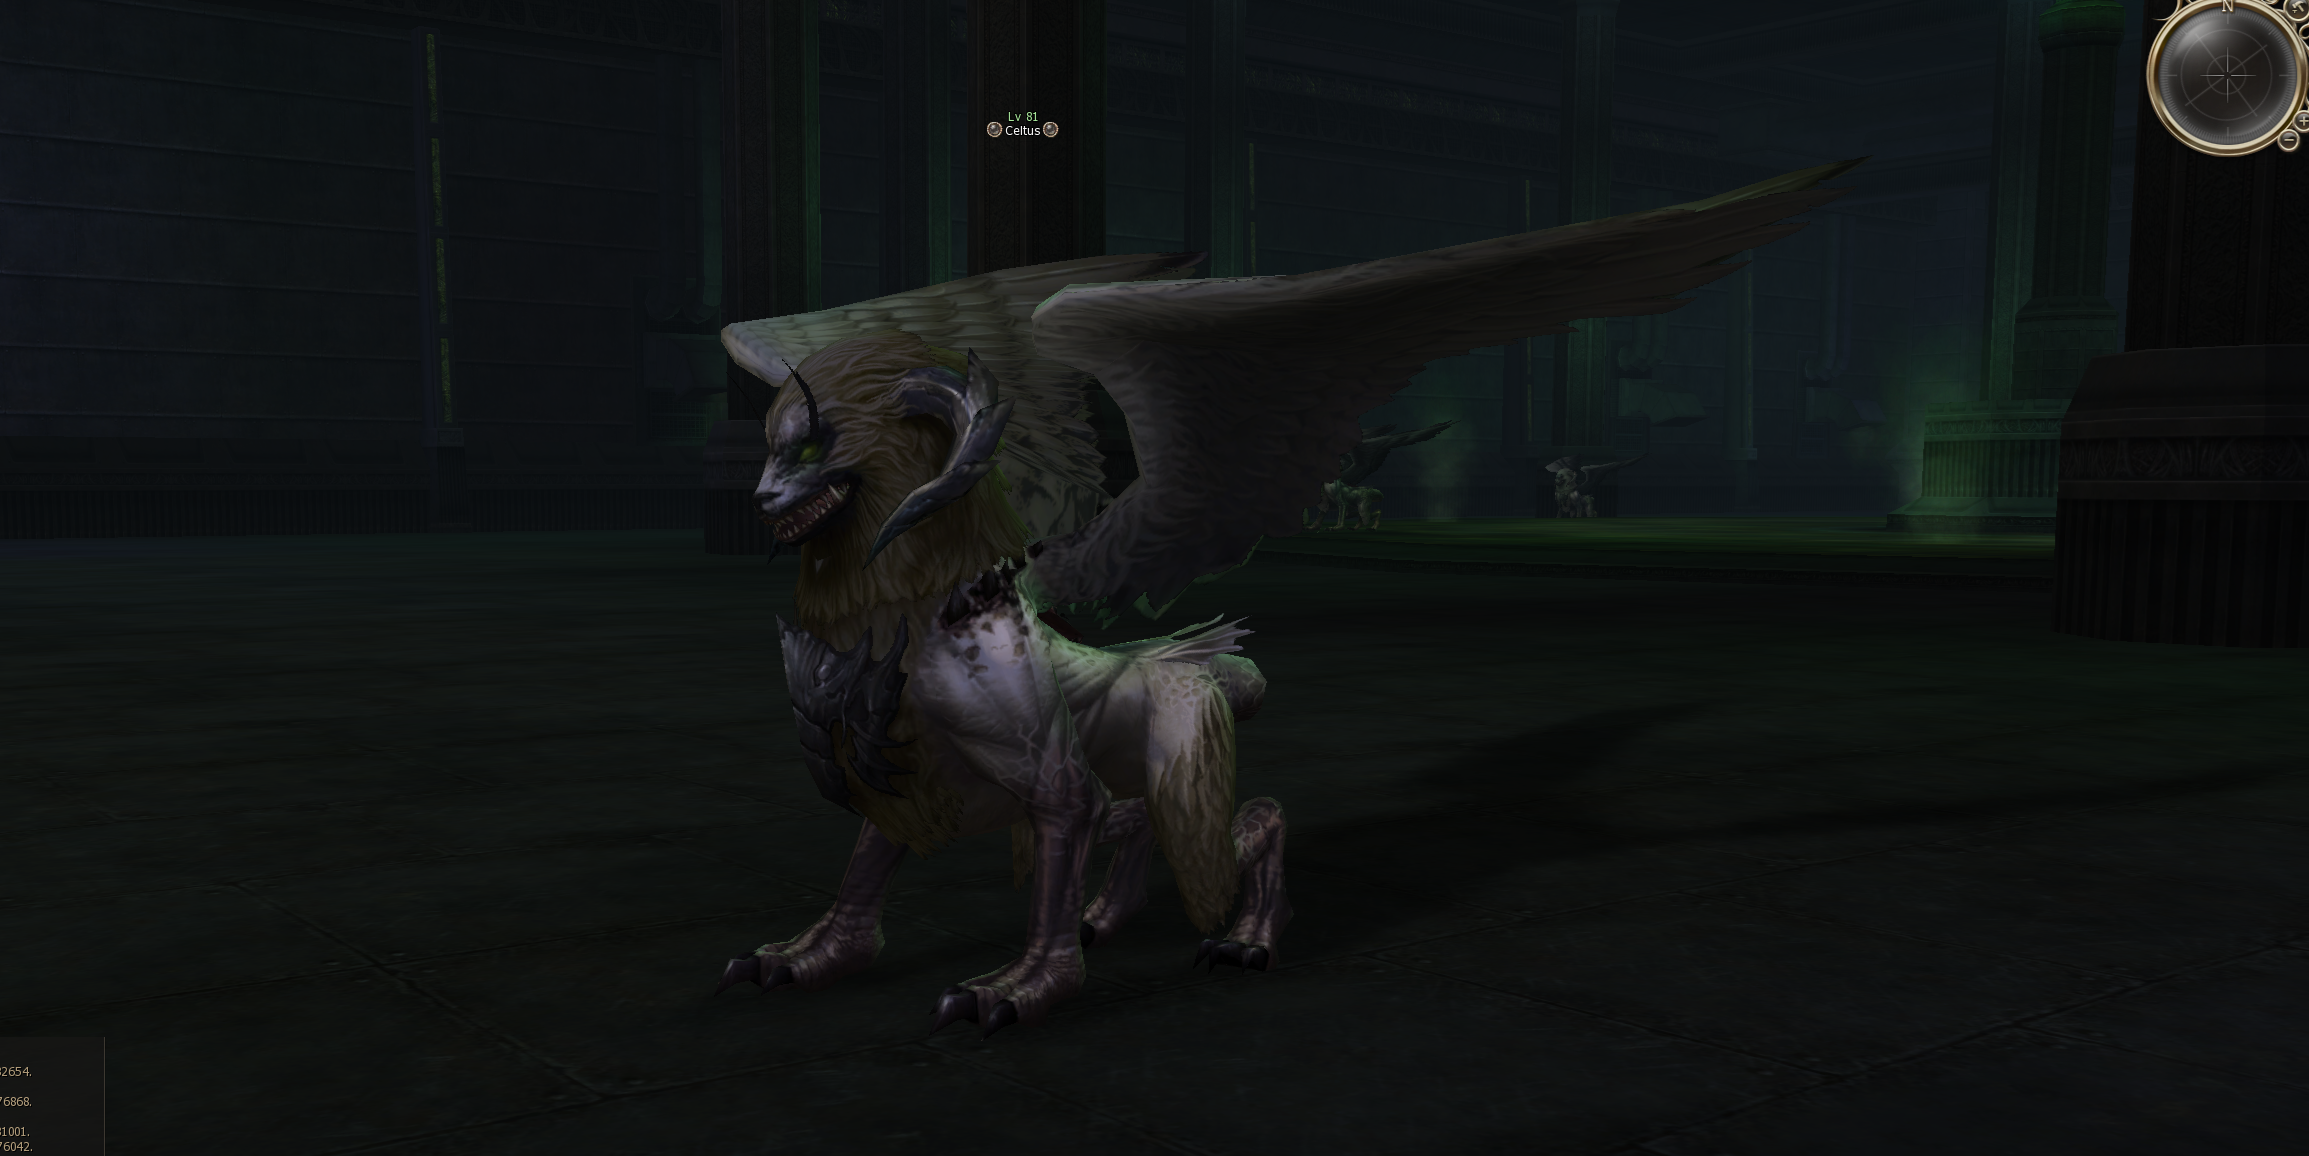
| Celtus | 100% Contained Life Force ×1 |
Chimeras give you Life Force but they never drop Contained Life Force. The 8 CLF for the Premium Cert come only from Celtus, 1 CLF per successful catch. That means 8 successful Celtus bottles per Premium Cert — and there are only 9 Celtus spawns on the whole island (see Section 06), so nearly every Celtus you find has to count.
Bonus: Celtus is also the highest-value Stage 12 mob (+10 points per kill, see Section 06) and rolls one of the biggest Tome bags on the island. One Celtus advances every farm goal in this guide simultaneously — it is the single most valuable kill on Hellbound.
On retail, Kief converted Dim/Life/Contained Life Force into trust at Hellbound level 7, but Project Ortos starts the island at level 11 and Kief's trust exchange is dead at launch. So we wired a new exchange into Hude: he buys back Dim Life Force you would otherwise discard.
- 20,000 adena per Dim Life Force, paid out instantly on trade.
- While Hellbound is at level 11, each Dim Life Force also contributes 5 points to the global Stage 12 unlock counter — a nice top-up alongside Celtus / Chimera farming.
- After Stage 12 is unlocked, the counter is zeroed and points stop counting, but Hude still pays the adena.
- Hellbound below level 11 → Hude refuses; come back later.
The button appears on Hude's dialog once you hold a Standard or Premium Caravan Certificate. Trade dumps your entire DLF stack at once.
05Sealed Dynasty Pieces — Hude's multi-sell
Once you carry a Premium Caravan Certificate, Hude's multisell2
option opens up. This is where you actually buy your Sealed Dynasty recepies and parts.
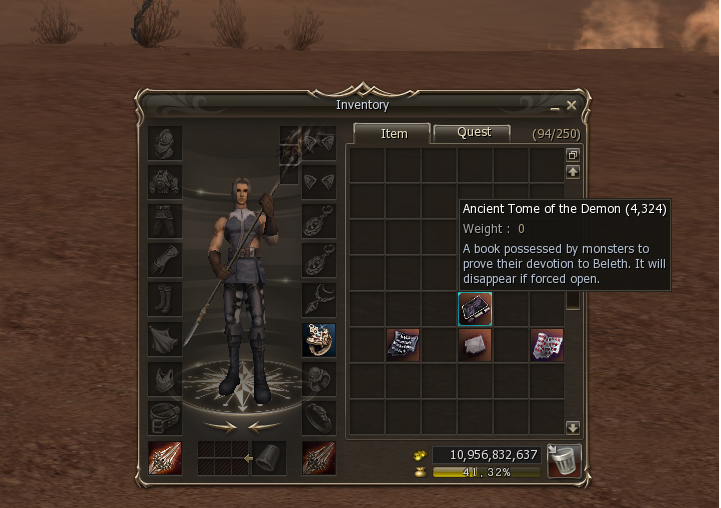
Three currency items, all sourced from one place: Ancient Tome of the Demon.
- Hidden First Page
- Hidden Second Page
- Demon Contract Fragment
How to get the currency — open Tomes
Ancient Tome of the Demon is a capsule item. Right-click it in your inventory: it consumes itself and rolls one of three outputs:
| Roll | Drop | Amount |
|---|---|---|
| 40% | Hidden First Page | 1 |
| 50% | Hidden Second Page | 2 |
| 10% | Demon Contract Fragment | 1 |
So Demon Contract Fragments are the rarest output — they are usually the bottleneck. Save up Tomes and burn them in big batches; opening one at a time wastes inventory space.
Where Tomes drop
Ancient Tome of the Demon drops on practically the entire Hellbound mob roster (you do not need to step into the Steel Citadel / Tower of Naia to farm it). Best targets on the main island, sorted by raw kill efficiency:
| NPC | Tome drop (per kill) |
|---|---|
| Celtus | 30–90 at 88.42% — best per-kill, also +10 Stage 12 points |
| Hellinark (Naia's Guardian) | 70–220 at 86.96% — huge bag, but rare spawn |
| Arcane Watchman | 10–30 at 72.84% |
| Junior Watchman / Junior Summoner | 5–15 at 72.10% — easy farm, dense spawns |
| Keltas | 20–60 at 70.80% |
| Arcane Scout | 10–30 at 70.54% |
| Chimera (Earth / Darkness / Wind / Fire) | 10–30 at 61–64% |
| Quarry Foreman | 10–30 at 59.77% |
| Quarry Patrolman / Sandstorm | 5–15 at 56–57% |
| Sand Scorpion / Desert Scorpion | 5–15 at 56–57% |
Many other Hellbound mobs (Subjugated/Charmed Native, Wandering Caravan, Blind Huntsman/Watchman, Sand Devil, Desiccator, Darion's Enforcer/Executioner, Quarry Bowman/Supervisor, Remnant Wraith, Enceinte Defender, etc.) also drop Tomes in smaller stacks (5 fixed at 10–60%) — anything you kill while doing other goals feeds the Sealed Dynasty pipeline.
Celtus and Chimeras are the same mobs you grind for the Stage 12 unlock (see Section 06). One kill gives you both the Stage 12 points and one of the highest Tome rolls on the island — they are the most time-efficient single targets in the whole guide.
On retail, Tomes drop in batches of 1–3. On Project Ortos, the amounts above are roughly 5× retail at the same ~55% chance — directly speeding up your whole Sealed Dynasty pipeline.
Sample multi-sell prices (per Sealed Dynasty piece)
Weapons
| Sealed Dynasty piece | Hidden 1st Page | Hidden 2nd Page | Demon Contract Fragment |
|---|---|---|---|
| Any weapon piece — Sword / Blade / Phantom / Bow / Knife / Halberd / Cudgel / Crusher / Mace / Staff / Bagh-Nakh | 68 | 168 | 17 |
| Recipe: any Sealed Dynasty weapon (60%) | 612 | 1530 | 153 |
Heavy armor
| Piece | Hidden 1st Page | Hidden 2nd Page | Demon Contract Fragment |
|---|---|---|---|
| Sealed Dynasty Breast Plate | 41 | 104 | 10 |
| Sealed Dynasty Gaiters | 28 | 72 | 7 |
| Sealed Dynasty Helmet | 16 | 42 | 5 |
| Sealed Dynasty Gauntlet | 13 | 30 | 4 |
| Sealed Dynasty Boots | 13 | 30 | 4 |
| Recipe: Breast Plate (60%) | 266 | 661 | 67 |
| Recipe: Gaiters (60%) | 166 | 413 | 42 |
| Recipe: Helmet (60%) | 100 | 248 | 25 |
| Recipe: Gauntlet (60%) | 66 | 164 | 17 |
| Recipe: Boots (60%) | 66 | 164 | 17 |
Light armor
| Piece | Hidden 1st Page | Hidden 2nd Page | Demon Contract Fragment |
|---|---|---|---|
| Sealed Dynasty Leather Armor | 32 | 78 | 8 |
| Sealed Dynasty Leather Leggings | 22 | 53 | 6 |
| Sealed Dynasty Leather Helmet | 18 | 43 | 4 |
| Sealed Dynasty Leather Gloves | 13 | 30 | 4 |
| Sealed Dynasty Leather Boots | 13 | 30 | 4 |
| Recipe: Leather Armor (60%) | 200 | 498 | 50 |
| Recipe: Leather Leggings (60%) | 125 | 314 | 31 |
| Recipe: Leather Helmet (60%) | 100 | 249 | 25 |
| Recipe: Leather Gloves (60%) | 66 | 164 | 17 |
| Recipe: Leather Boots (60%) | 66 | 164 | 17 |
Robe
| Piece | Hidden 1st Page | Hidden 2nd Page | Demon Contract Fragment |
|---|---|---|---|
| Sealed Dynasty Tunic | 32 | 78 | 8 |
| Sealed Dynasty Stockings | 22 | 53 | 6 |
| Sealed Dynasty Circlet | 16 | 42 | 5 |
| Sealed Dynasty Gloves | 12 | 30 | 4 |
| Sealed Dynasty Shoes | 12 | 30 | 4 |
| Recipe: Tunic (60%) | 200 | 498 | 50 |
| Recipe: Stockings (60%) | 125 | 313 | 31 |
| Recipe: Circlet (60%) | 100 | 249 | 25 |
| Recipe: Gloves (60%) | 67 | 161 | 17 |
| Recipe: Shoes (60%) | 67 | 161 | 17 |
Shield & Sigil
| Piece | Hidden 1st Page | Hidden 2nd Page | Demon Contract Fragment |
|---|---|---|---|
| Sealed Dynasty Shield | 12 | 30 | 4 |
| Sealed Dynasty Sigil | 12 | 30 | 4 |
| Recipe: Shield (60%) | 70 | 179 | 17 |
| Recipe: Sigil (60%) | 70 | 179 | 17 |
Jewelry
| Piece | Hidden 1st Page | Hidden 2nd Page | Demon Contract Fragment |
|---|---|---|---|
| Sealed Dynasty Earring Gemstone | 12 | 35 | 4 |
| Sealed Dynasty Necklace Gemstone | 17 | 42 | 5 |
| Sealed Dynasty Ring Gemstone | 10 | 25 | 2 |
| Recipe: Earrings (70%) | 66 | 162 | 16 |
| Recipe: Necklace (70%) | 88 | 220 | 21 |
| Recipe: Ring (70%) | 42 | 110 | 11 |
Recipes craft at 60% for armor / weapons and 70% for jewelry. The exchange uses Hidden Pages + Demon Contract Fragments — your Premium Caravan Certificate stays in your inventory the whole time and just keeps the menu open.
06Unlocking Stage 12 (community goal)
Stage 12 is the brand new servet stage 2 tier on Project Ortos that goes beyond the retail cap of Hellbound level 11. Once unlocked, it opens up the Beleth raid, and the Anomic Foundry / Icarus chain.
Stage 12 is NOT reached by accumulating trust like the previous levels. Auto trust-level-up is hard-capped at level 11. The unlock is a kill-counter — every player on the server contributes to it.
How the kill counter works
| What you kill | Points |
|---|---|
| Any registered Hellbound mob | +1 |
| Chimera (Earth / Darkness / Wind / Fire) | +5 |
| Celtus | +10 |
Unlock threshold: 400 000 points. Once reached, the server automatically promotes Hellbound to level 12 and announces it globally.
Checking the progress
Type .hellbound in chat. While the island is at level 11, the message includes
the Stage 12 unlock counter:
Hellbound level: 11 trust: 4000123 | Stage 12 progress: 12345 / 400000
Celtus — the optimal grind target
Celtus is a level-80+ rare elite that gives +10 points per kill. We have expanded the spawns and normalised the respawn timer specifically to make Stage 12 farming viable:
- 3 retail spawns active at the current Hellbound stage — respawn timer normalised to a fixed 2-hour cycle (was 90–150 min random on retail). A 4th retail spawn exists in the data but is stage-locked to HB level 7–8 only, so on a server already past that point it never appears in-game.
- + 6 NEW custom spawns — also fixed 2-hour respawn.
- = 9 Celtus total on the island in practice.
Custom spawn areas (the 6 added on top of retail):
- 2× near the Arcane Scout area
- 2× in the scorpions desert
- 2× near the Remnant Wraith area
07Icarus weapons (Anomic Foundry & Jude)
Once Stage 12 is unlocked, the path to Icarus weapons opens up. The chain is handled by Quest — Jude's Request.
Step 1 — Get to the Anomic Foundry
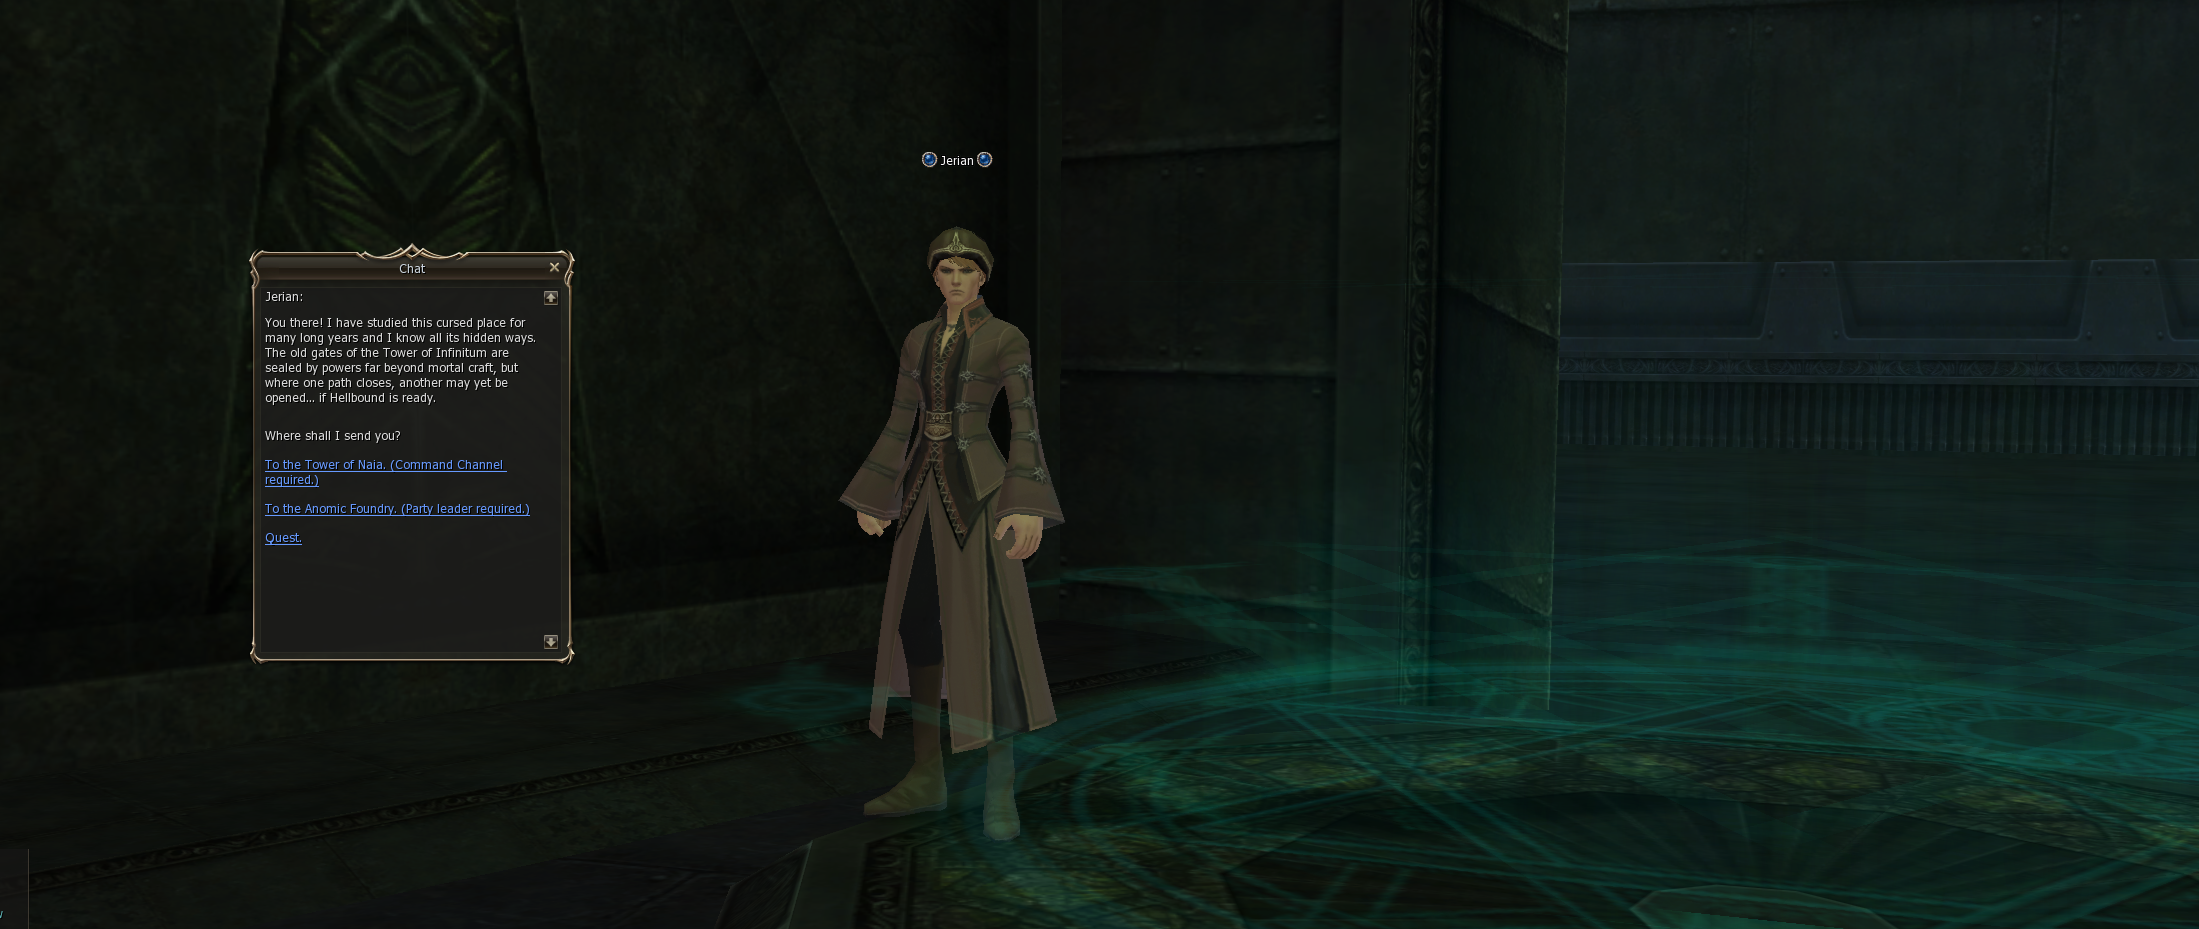
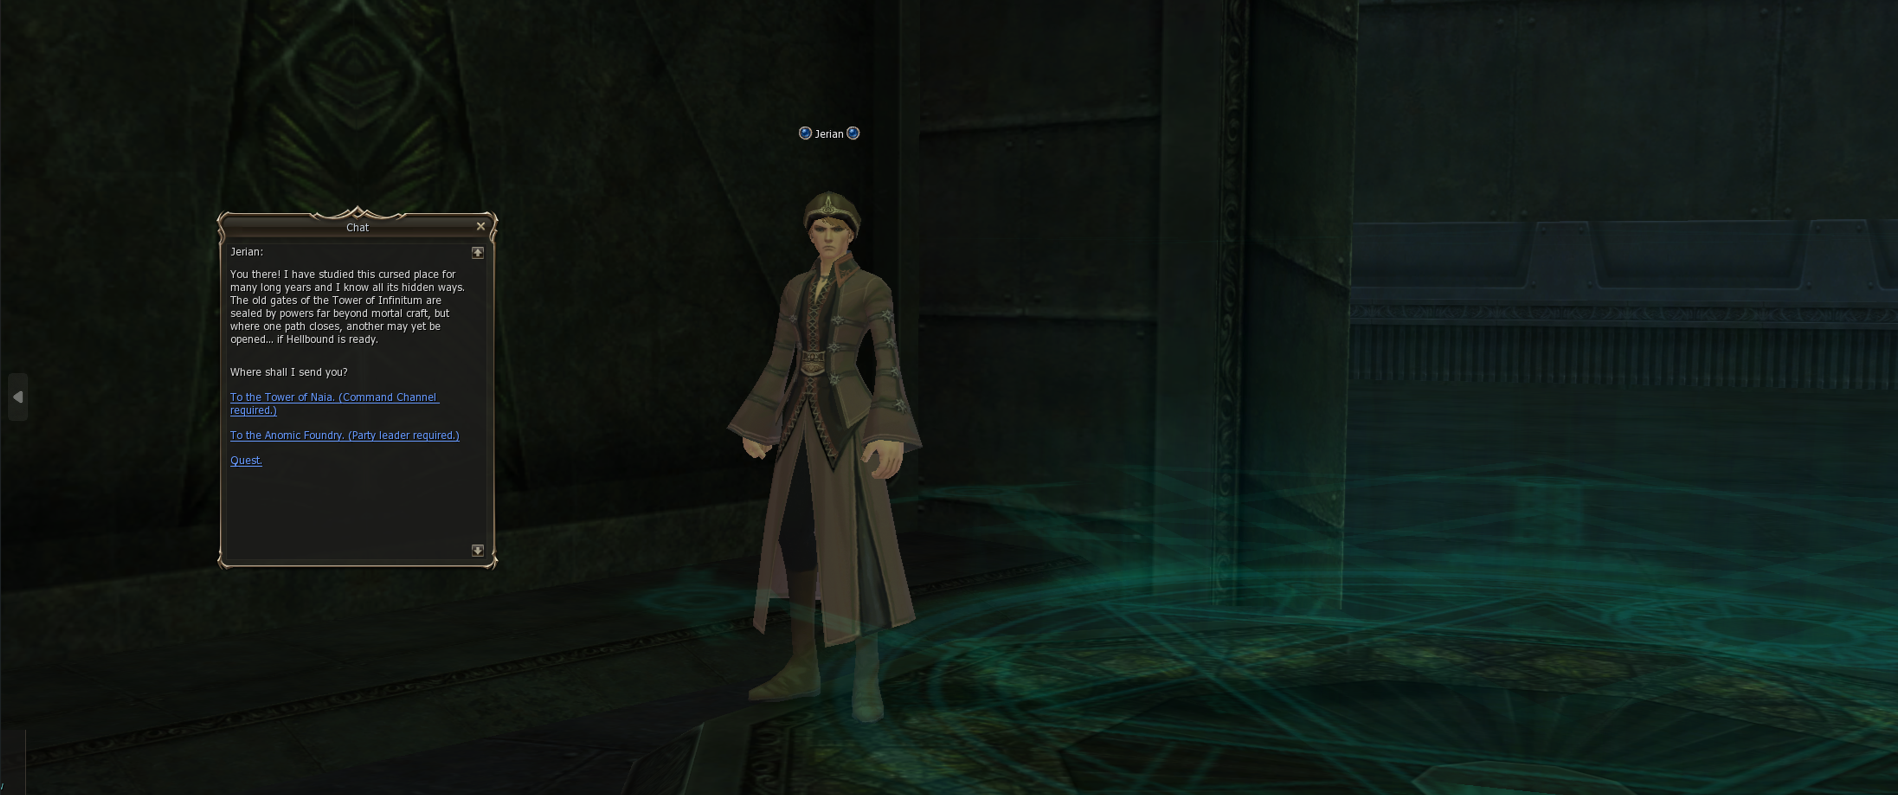
Talk to Jerian in the Tower of Infinitum. He offers two teleport options — choose Anomic Foundry.
You must be a party leader of a party with at least 2 members to be teleported to the Foundry.
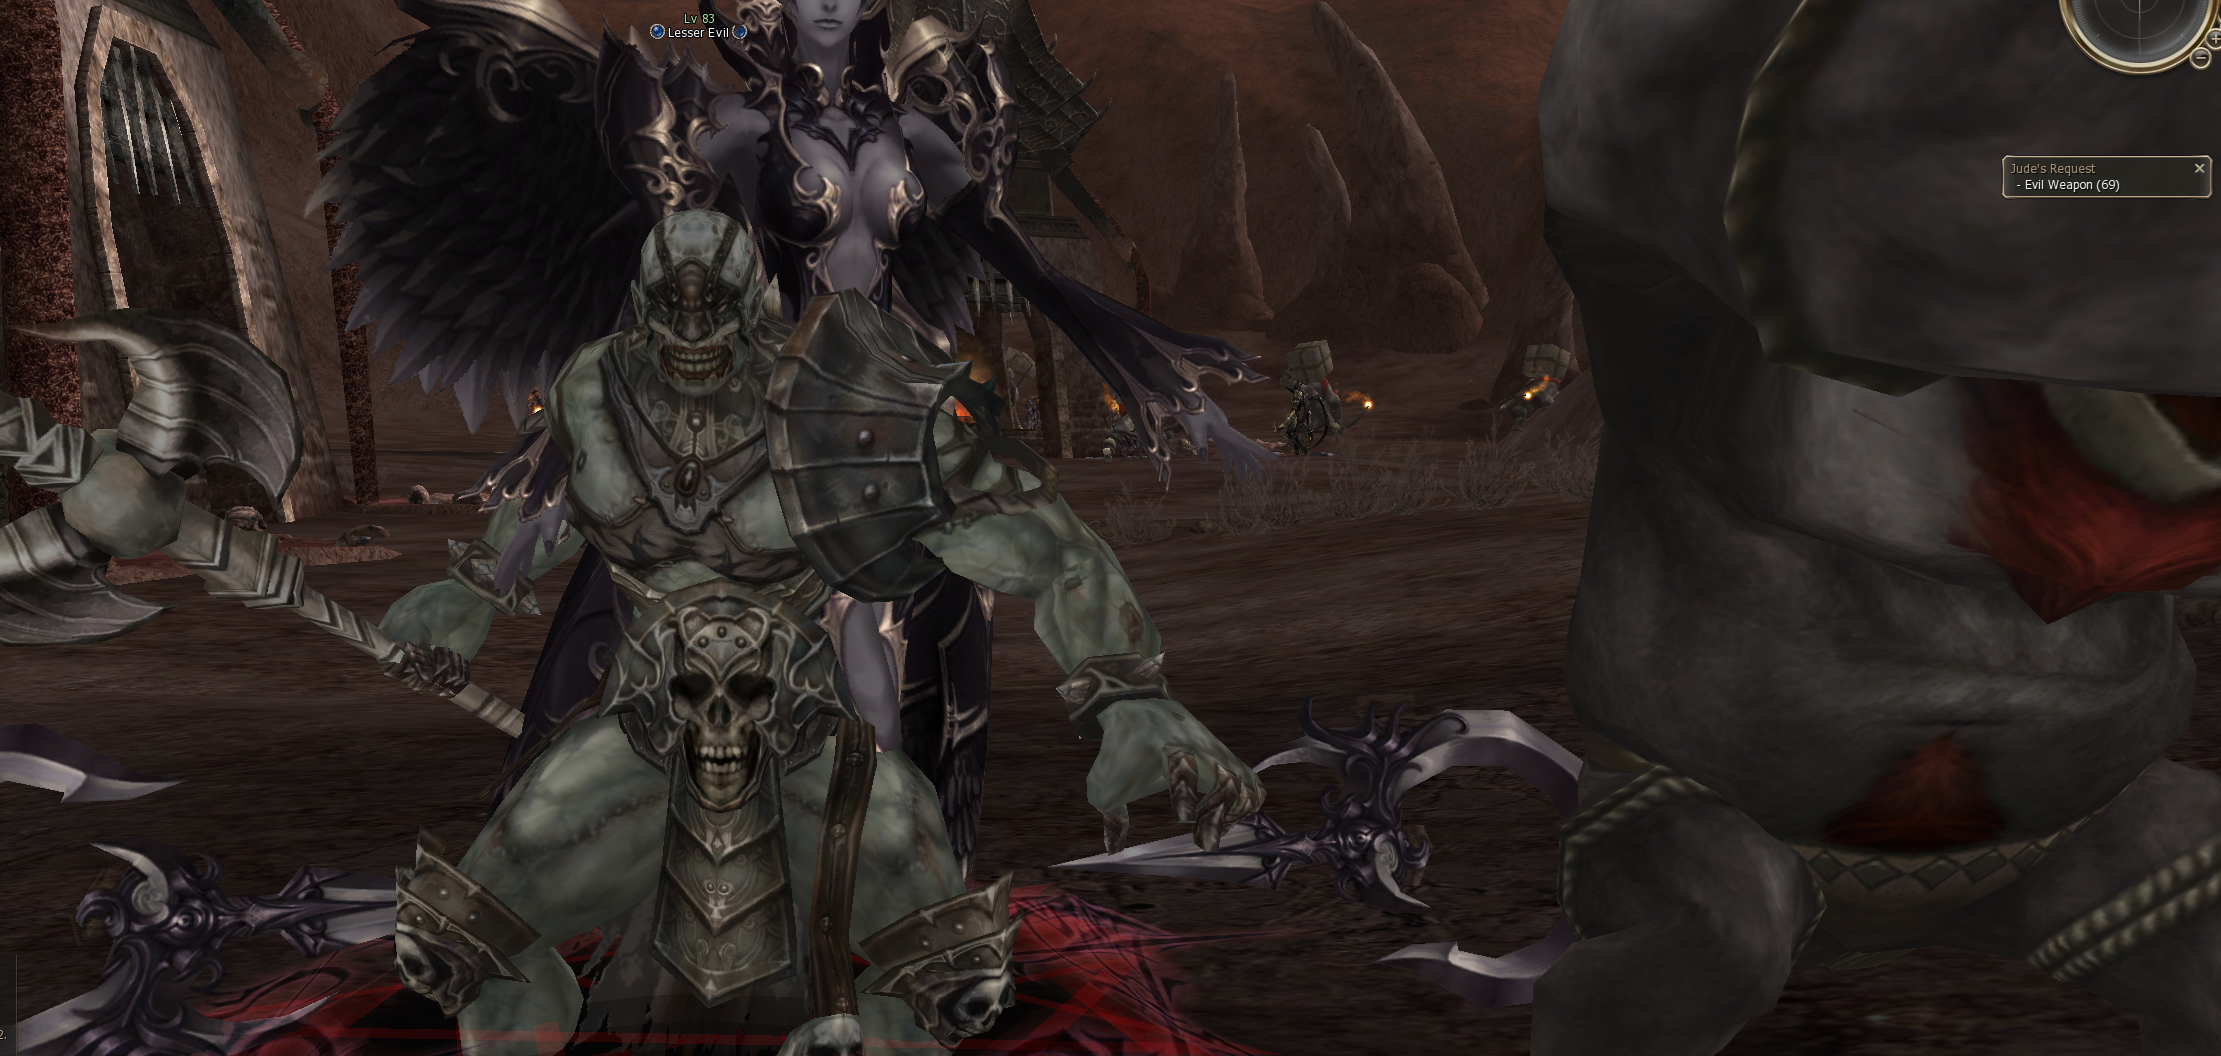
Step 2 — Spawn Lesser / Greater Evil
Inside the Foundry, hunt the regular workforce:
| NPC | Lesser Evil chance | Greater Evil chance |
|---|---|---|
| Foundry Laborer (HP × 3 — ~11.5k) | 5% | 3% |
| Foundry Foreman | 10% | 7% |
On death, a Lesser or Greater Evil spawns directly on the corpse. Both rolls are independent — the same kill can trigger both.
Lesser / Greater Evil do not spawn anywhere statically on the map. The corpse-spawn is the only way to summon them. The legacy retail system (timer-based respawn + Laborer alarm + teleport conversion) has been removed.
Step 3 — Drop Evil Weapons
| NPC | Base drop | Bonus (30%) | Spoil | Max per kill |
|---|---|---|---|---|
| Lesser Evil | 5 EW | +2 EW | +2 EW | 9 EW |
| Greater Evil | 10 EW | +2 EW | +5 EW | 17 EW |
Drops follow your party's loot rules (Random / Round Robin).
On retail, Evil Weapon is a quest item — locked to your inventory. On Project Ortos it is a regular tradable item: you can trade, drop, and sell it between players freely. This means Foundry farmers can sell EW stacks to crafters and skip Jude entirely if they prefer.
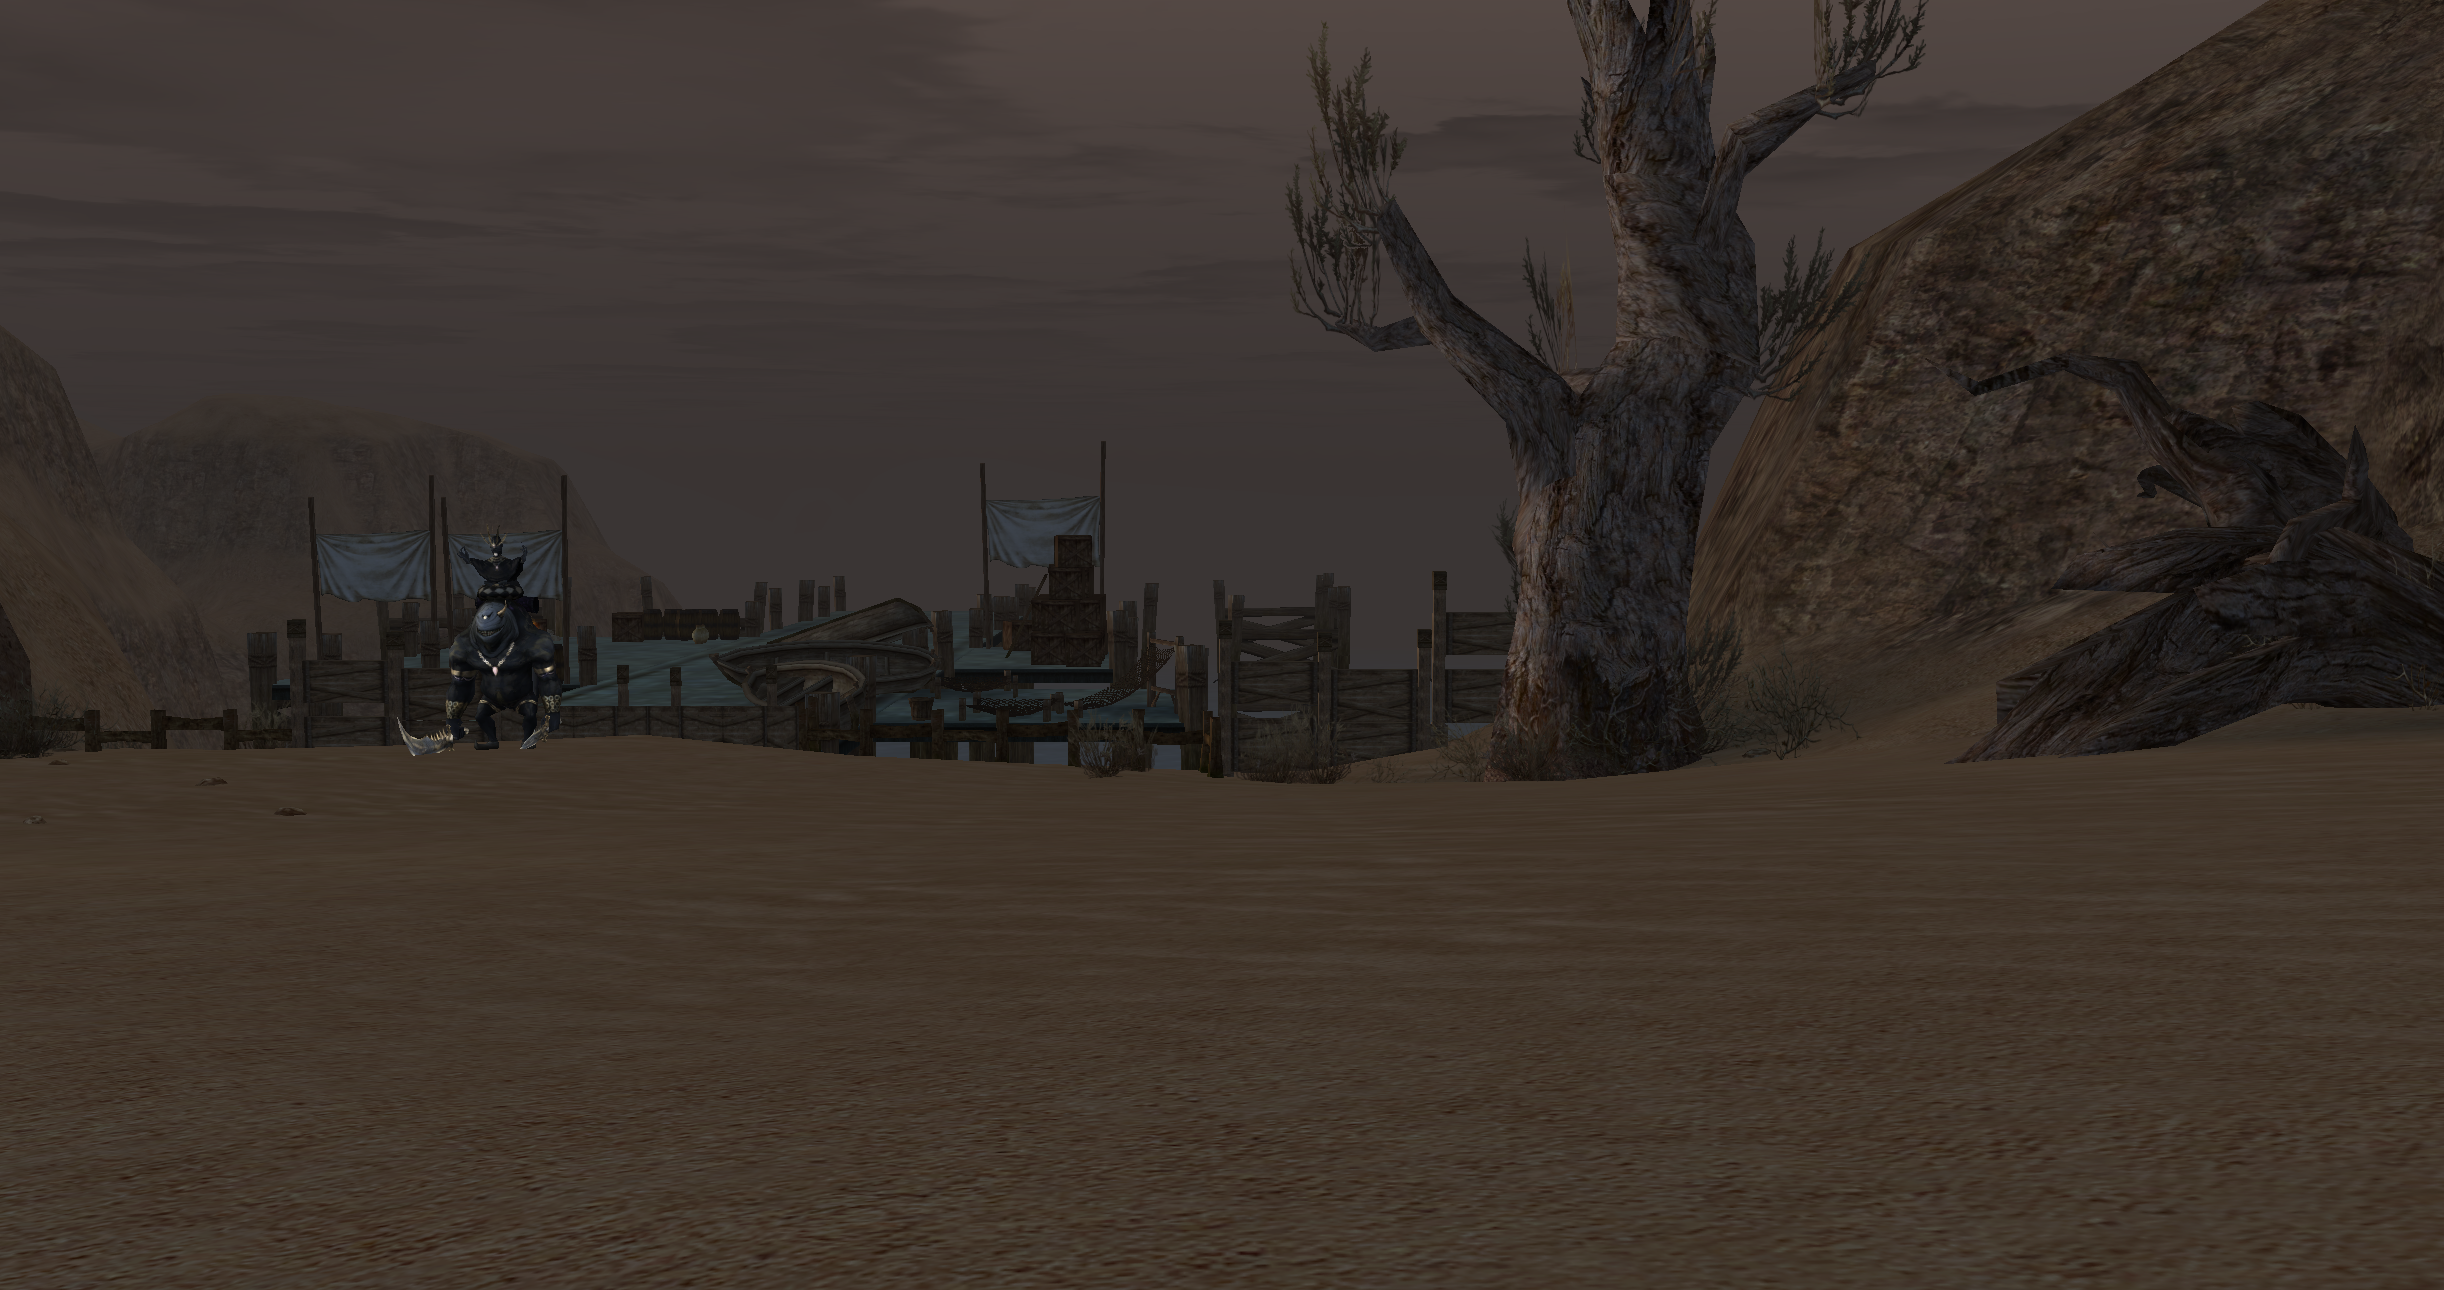
Step 4 — Trade Evil Weapons with Jude
Jude — he stands right next to Hude on the desert side of Hellbound (Battered Lands area). So once you have looted your Evil Weapons in the Foundry, walk back to the same spot you visit for the Caravan Certificate exchanges. Jude handles the Icarus trade:
| You give | You receive |
|---|---|
| 200 Evil Weapons | 1 random Icarus weapon recipe |
| 5 Evil Weapons | 3 random Icarus weapon parts |
Jude's dialog has always advertised "3 weapon pieces for every 5 Evil Weapons", but retail code mistakenly gave only 1. We fixed it — the trade now matches the dialog text. 5 Evil Weapons = 3 pieces.

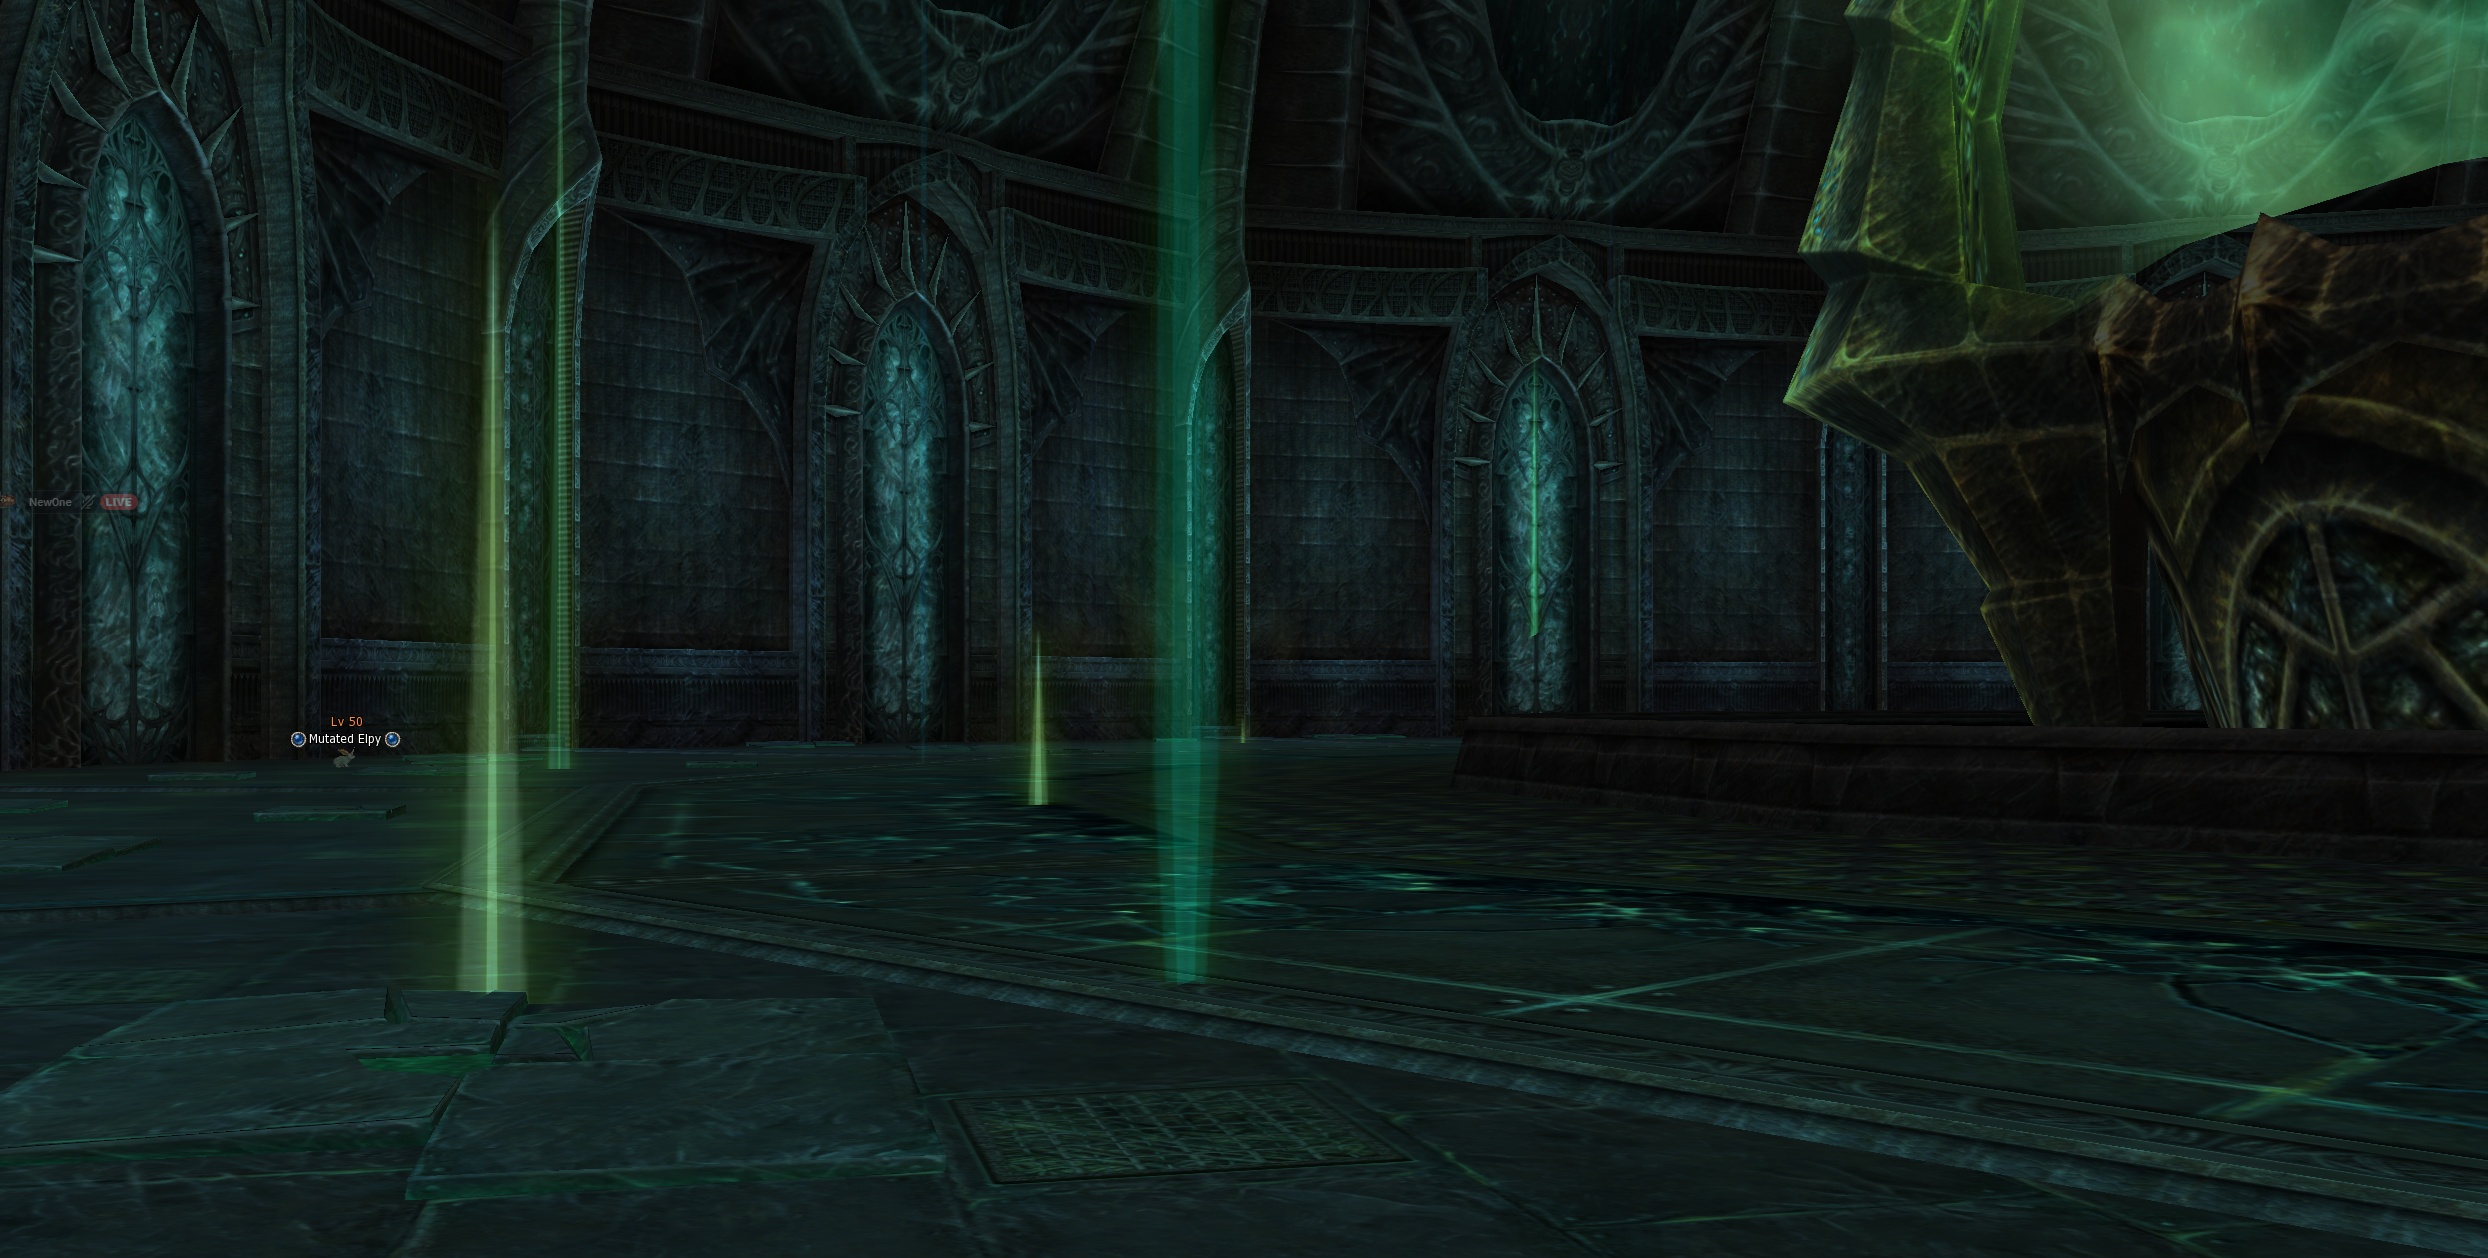
08Tower of Naia (Jerian, Mutated Elpy, Spore)
Tower of Naia is the road to Beleth. Entry is gated by Jerian — there are no auto-spawns or time windows like on retail. The whole zone is driven by Command Channel clicks.
Entry requirements (Tower of Naia option)
- You must be a Command Channel of at least 11 members.
- The Hellbound island must be at Stage 12.
"I sense the magic barrier still pulses with strength... Until this cursed land reaches its twelfth stage of awakening, even my arts cannot pierce the seal."
What happens when you click Tower of Naia
CC1 clicks tp_naia
    │
    ├─►  Spawn Mutated Elpy (single-instance — only if not already alive)
    ├─►  25-minute cooldown for the next CC click (chase mechanic)
    ├─►  90-minute deadline to kill Elpy
    └─►  Teleport CC to the standard spawn point in Naia Tower
The 90-minute deadline
- Counts from the fresh Elpy respawn. Subsequent chase clicks do not extend it.
- Cancelled when Elpy is killed (= success).
- Expiry → everyone in Tower of Naia is kicked back to Jerian and Elpy despawns.
The chase mechanic (25-min cooldown)
If a second CC clicks during the 25-min cooldown they are blocked. After 25 minutes, a competing CC can enter — Elpy is still alive, the original deadline is still ticking, the door to the boss room stays open. Both CCs can race for the kill.
- Element index limit 120 → 90 (puzzle is ~25% faster).
- Idle abort (600 self-despawns) kicks everyone in the entire tower back to Jerian.
- A second Elpy killed during an active spore challenge is silently despawned (no puzzle reset).
Logout / login auto-rejoin
Crashes and short DCs are forgiven. The server remembers your party leader and logout timestamp inside the raid zones (TON, spore room, Beleth zone).
| Re-login | What happens |
|---|---|
| Within 10 minutes | Auto-rejoin party + teleport directly to your leader (no re-invite needed). |
| After 10 minutes | Teleported out (TON / spore → Jerian, Beleth → nearest town). |
| Party is full (9/9), leader offline, or leader has left the zone | Teleported out — same as if grace had expired. |
Goal: a crash should not cost you your raid spot, but AFK loaders cannot hold a slot indefinitely.
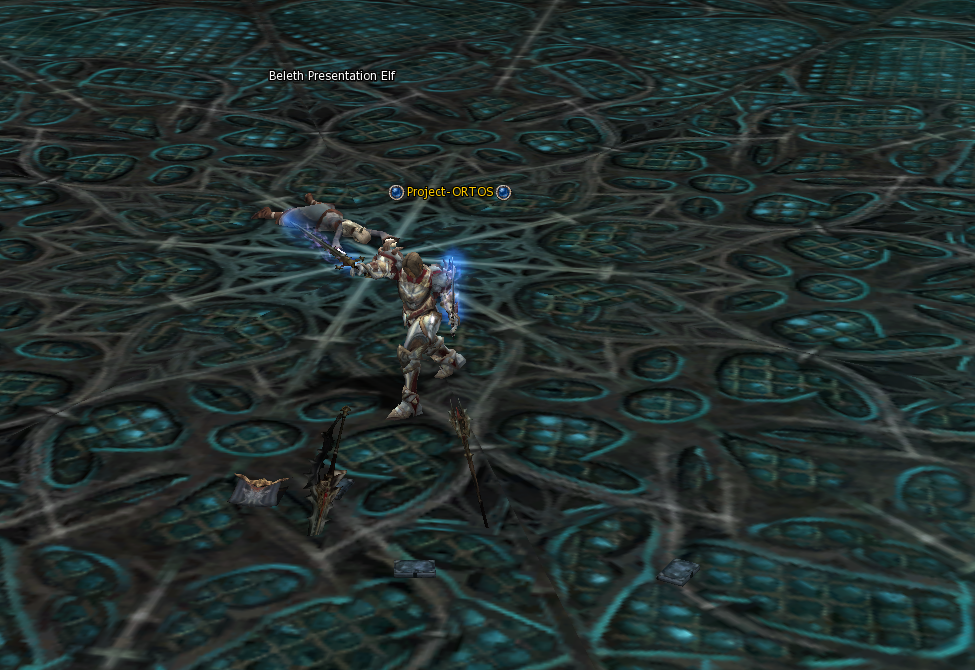
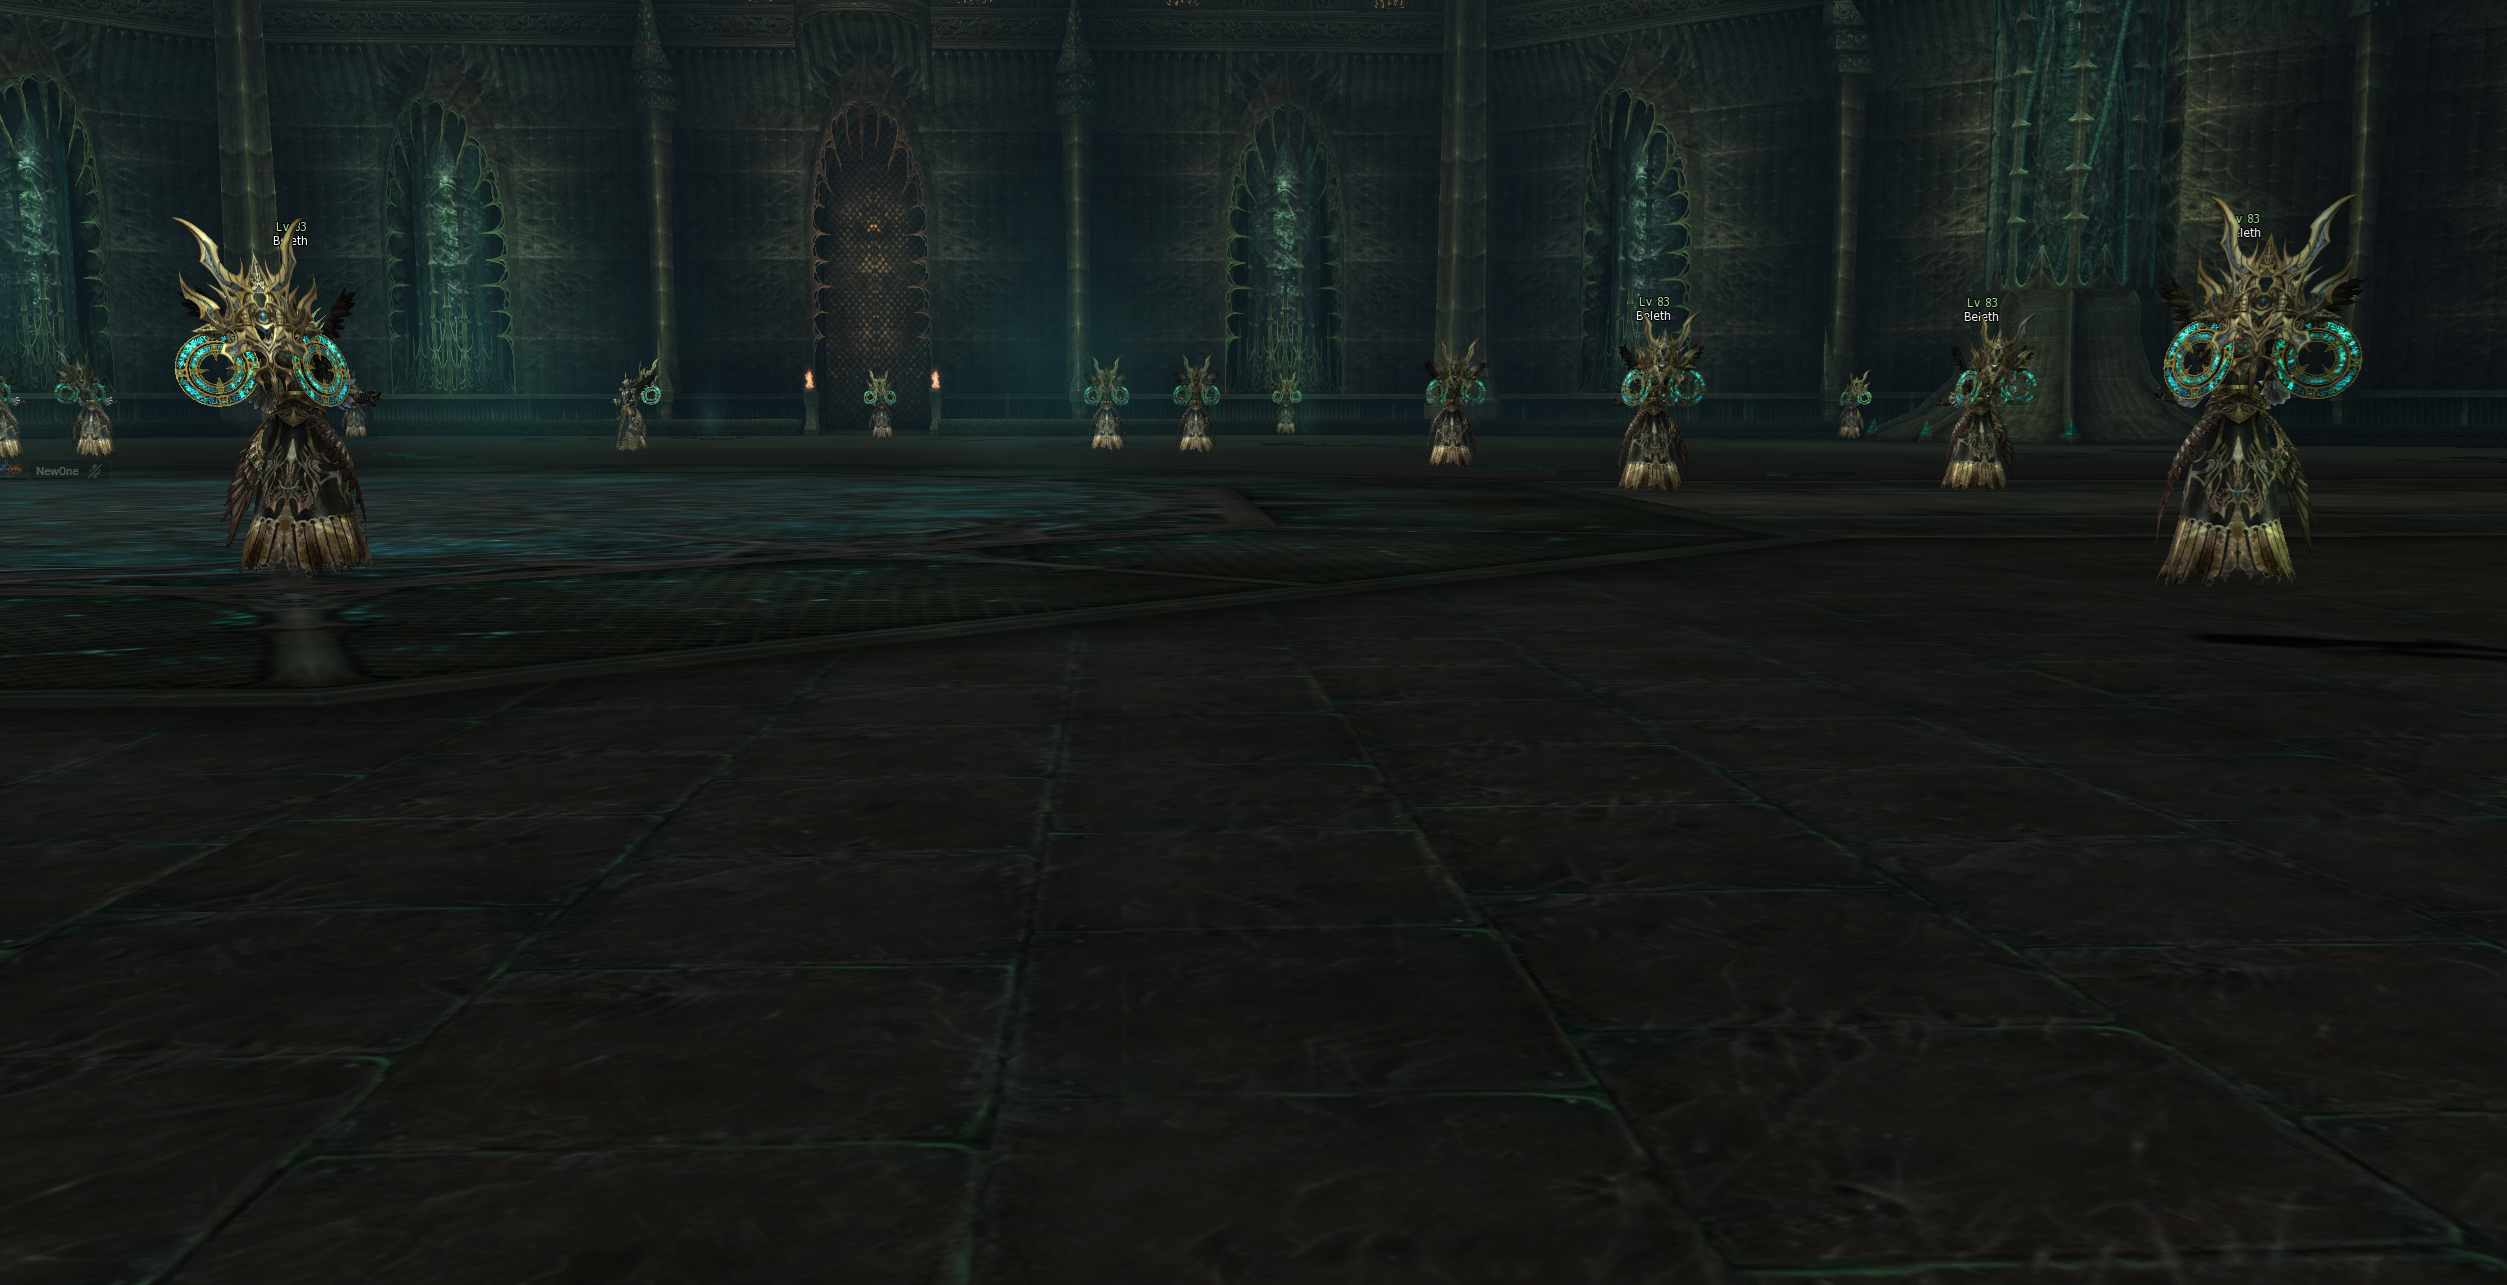
09The Beleth fight
Once Mutated Elpy is dead and your CC has cleared the spore challenge, you can engage Beleth, the final boss of Hellbound. The fight has been retuned for the smaller Project Ortos community size.
Project Ortos changes vs retail
| Retail | Project Ortos | |
|---|---|---|
| Minimum CC members | 36 | 11 |
| Time cap | single 15-min cap for the whole fight | 25 min per phase — each fake-Beleth round + the real Beleth fight have their own 25-min timer that resets on every progress event |
| Worst-case total fight length | ~15 min | up to ~150 min (5 fake rounds × 25 min + 25 min for the real boss) |
| "You found me" hint | none — pure RNG until something dies | at 75% HP the correct fake Beleth shouts a clear taunt (one-shot per round) |
The retail 15-minute hard cap was tuned for 36-player groups. With our 11-player minimum those phases simply could not finish in time, so we give each phase its own fresh 25-min timer instead. The taunt hint removes the "is this the right one?" coin-flip — once a fake Beleth dips below 75% HP and shouts at you, you commit and finish the kill.
How the fight works (overview)
- Your CC enters the Steel Citadel teleport. Beleth zone gets locked to your CC for the duration of the fight.
- After the entry timer (5 min), the first wave of fake Beleths spawns. One of them is the "correct" one — the CC must identify and kill it. 25-min timer on this round.
- At 75% HP the correct fake shouts "ARGH! You found me, you little brat! Don't think I'll go down easy!" — your cue to commit DPS and finish it.
- Killing the correct fake → cancels the round's 25-min cap, short break, then the next fake-Beleth wave spawns with a fresh 25-min timer. Repeat for 5 rounds total.
- After the 5th correct kill, the real Beleth spawns with its own 25-min cap. Drop it → loot the rewards. Done.
Per phase there are actually two 25-min timers ticking:
- PHASE_TIMEOUT — the hard cap (no progress in 25 min → wipe + reset).
- CHECK_ATTACK — idle watchdog (no attack on Beleth in 25 min → same wipe + reset).
Either one expiring kicks everyone to town, despawns the NPCs and resets the kill count. In practice if your CC is engaging the boss you only ever interact with PHASE_TIMEOUT.
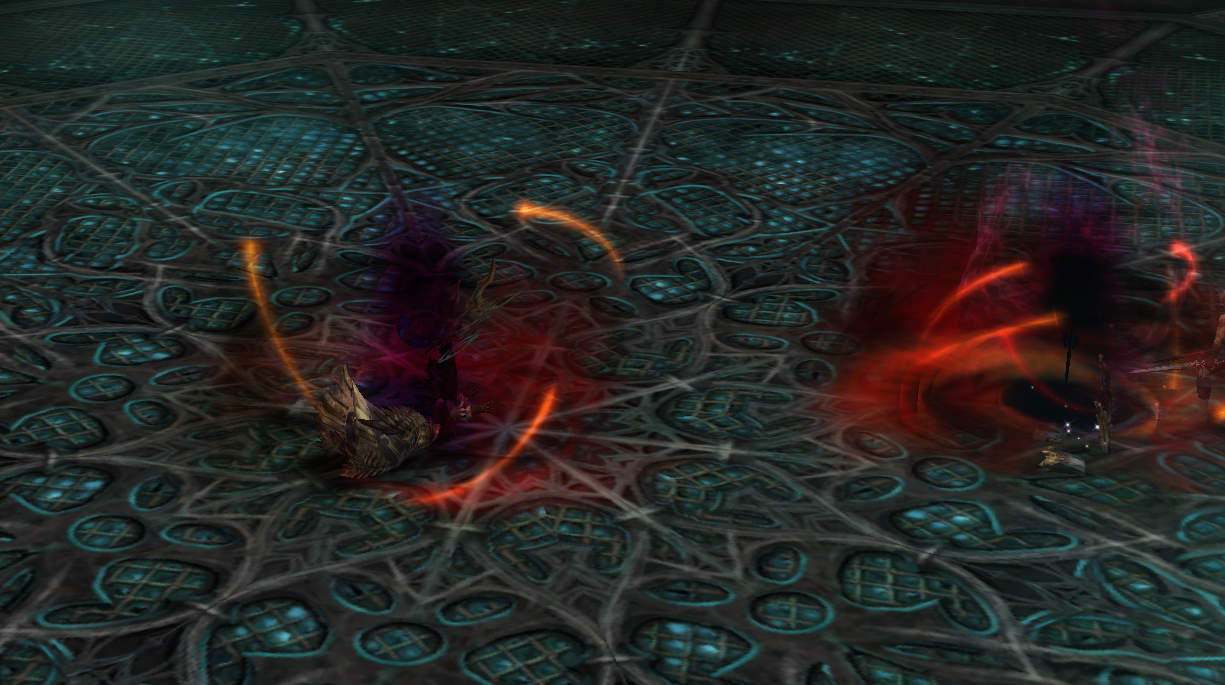
Loot — Ring of Beleth
The Ring of Beleth is the signature reward of this raid. It is not a regular drop on Beleth's corpse — instead, the moment Beleth dies a Stone Coffin spawns inside the boss arena. Only the player who landed the killing blow on the real Beleth can talk to the coffin and receive the ring.
Anyone else in the CC who clicks the coffin gets a "not for you" dialog. Plan the kill accordingly — typically the CC leader / main DPS finishes Beleth so the ring goes to a pre-agreed person. There is 1 ring per Beleth kill; the rest of the CC share whatever else drops in the zone.
Ring of Beleth — stats
- S-grade ring, enchantable
- +12% M.Def
- +105 HP / +38 MP
- +30 resistance to Dark attacks
- +10 resistance to Mental abnormal state / +10 chance to inflict Mental abnormal state
- +0.23 MP recharge power
Wearable in either ring slot, so you can stack two if your CC manages to kill Beleth twice and you keep both rings.
The moment a CC enters Beleth's zone:
- Mutated Elpy is despawned.
- The Tower of Naia 90-min deadline is cancelled.
- Everyone still inside TON is kicked back to Jerian.
In other words: be sure your whole CC has finished with TON before you commit to Beleth — there is no going back to fight Elpy mid-Beleth.
Boss-room door
The boss-room door does not auto-close on Elpy kill — it stays accessible so a chase CC still has a window to enter the spore challenge. This is intentional: on retail the door slamming shut killed off chase mechanics entirely.
10Cheat sheet
- 20 Darion's Badge → Falk → Basic Caravan Cert.
- Basic + 30 Mark of Betrayal + 60 Stinger → Hude → Standard Caravan Cert.
- 20 Stinger → Kief → Magic Bottle (one-time, re-usable forever).
- Beat target under 10% HP, then bottle (drops on the ground for you): Celtus → 1 Contained Life Force, Chimera → 80% Dim / 16% Life Force / 4% nothing.
- Standard + 30 Life Force + 8 Contained Life Force → Hude → Premium Cert + Map.
- Hold Premium Cert → Hude opens Sealed Dynasty multi-sell.
- Farm Ancient Tomes → open them for Hidden Pages + Demon Contract Fragments.
- Pay the multi-sell → Sealed Dynasty Pieces → craft / unseal your Dynasty.
- Hellbound must be at level 11.
- Grind any HB mob (+1), Chimeras (+5), or Celtus (+10).
- Reach 400 000 points server-wide.
- Server auto-promotes to Stage 12.
- Check progress with
.hellbound.
- Stage 12 unlocked, party leader of a 2+ party.
- Talk to Jerian → teleport to Anomic Foundry.
- Kill Foundry Laborer / Foreman → roll Lesser / Greater Evil.
- Loot Evil Weapons.
- Trade with Jude: 200 EW = recipe, 5 EW = 3 parts.
- Craft / assemble your Icarus weapon.
- Form CC of 11+ members.
- Talk to Jerian → Tower of Naia.
- Kill Mutated Elpy within 90 minutes.
- Clear spore challenge (90 elements).
- Enter Steel Citadel teleport with the CC leader.
- 5 fake-Beleth rounds — listen for "ARGH! You found me..." at 75% HP to confirm the correct clone (25 min/round).
- After the 5th correct kill, drop the real Beleth (own 25-min cap).